How to Measure for Pantry Shelves
As an Amazon Associate we earn from qualifying purchases.
How to measure for pantry shelves starts with a sketch and a tape measure, not a shopping cart. You need the width, height and depth of the space, the size of the door opening, and a list of whatever sticks out of the walls or gives off heat. IKEA, NKBA, Elfa and ClosetMaid all publish pieces of the method. This guide puts those pieces in order, adds worked fit tables with every assumption labeled, and ends with a checklist you can take into the pantry.
Quick answer
- Draw the space first, one sheet per wall if you can. IKEA’s U.S. measuring guide says to measure each wall fully from floor to ceiling, include door and window frames, and note anything that extends into the room.
- Take each reading in at least two places. IKEA says to do that for countertop lengths and depths, and its Canadian planning page says to measure more than once. Let the smallest reading decide whether a shelf fits (our rule).
- Measure a doorway between the face of the door and the stop with the door open 90 degrees, the method in NKBA’s kitchen entry guideline.
- Match the readings to stock sizes: Elfa wire shelves come in 12, 16 and 20 inch depths, and modular systems come in fixed section totals that you can cut to fit.
Before you measure: tools and a sketch
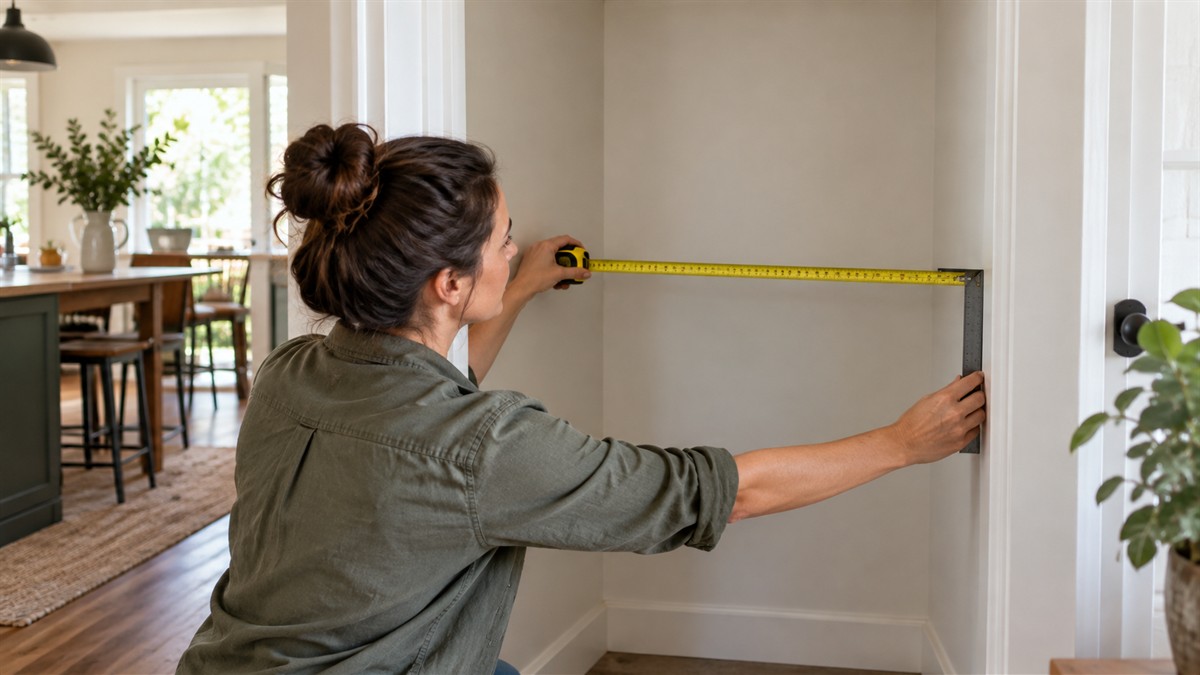
The IKEA U.S. guide, How to measure your kitchen, starts with tools: pen, paper and measuring tools. It asks you to draw the room layout on a sheet of paper, with one piece of paper for each wall, and to include fractions of an inch. For a pantry that means a plan view for the floor, plus an elevation, a flat drawing of each wall, with the shelves in mind. Write every reading on the drawing, so that readings taken at different heights sit side by side.
The guide is written for kitchens, not pantries. Its steps still carry over, because a pantry is a small room or cabinet with the same kinds of obstacles. The sources we opened do not give a pantry-specific measuring routine, so the checklist at the end of this guide is our own assembly of the cited steps.
Measure the space: width, height and depth
Width and height come straight from the IKEA steps. Measure each wall fully from floor to ceiling and from doors to windows, including the door and window frames. Measure the floor to ceiling and mark the highest and lowest points, and remember to include soffits. For a pantry, add the width wall to wall at the height where each shelf will sit. IKEA’s countertop step says to take length and depth measurements from at least two places, and its Canadian kitchen planning page adds “measure more than once, if possible, to check your work.” Neither page says which reading to use when they differ. Using the smallest is our rule, because a shelf that fits the narrowest point fits everywhere along the wall.
Depth is the third reading. Measure from the back wall to the front of the opening, to the door frame or to the door stop, whichever a shelf has to clear. IKEA’s U.S. guide repeats a check that matters here: note anything that extends into the room, with radiators, exhaust vents and window sills as examples. In a pantry that can include a window sill, a vent, a radiator or a pipe. If the pantry sits under stairs, the highest and lowest points of the ceiling matter even more, and our guide to pantry storage under stairs shows how makers state sizes for such spaces.
| What to measure | How | Where the method comes from |
|---|---|---|
| Wall width | Wall to wall at the height of each planned shelf, in at least two places, smallest reading rules | IKEA U.S. guide for the two-place rule; the smallest-reading rule is ours |
| Height | Floor to ceiling, marking the highest and lowest points, including soffits | IKEA U.S. guide |
| Depth | Back wall to the front of the opening or door frame, at several heights | Our adaptation of the IKEA wall steps |
| Obstacles | Mark radiators, vents, window sills, pipes, outlets, switches and gas lines on the sketch | IKEA U.S. guide |
| Heat sources | Mark range, oven, water heater, dishwasher and hot pipes nearby | Texas A&M AgriLife Extension |
| Doorway | Clear opening between the face of the door and the stop, door open 90 degrees | NKBA kitchen entry guideline, citing ICC A117.1 |
Mark what you cannot shelve around
The IKEA guide asks you to note all water supply and drain pipes, and to mark existing power outlets, switches and gas lines. Put each on the sketch at the height where it sits. Then add the thing a food pantry needs that a kitchen sketch does not. The Texas A&M AgriLife Extension publication on safe home food storage says pantry conditions should be dry, cool and dark, ideally 50 to 70 degrees Fahrenheit. It says to keep food in the coolest cabinets, away from the range, oven, water heater, dishwasher and any hot pipes. It also says to store foods off the floor and away from walls. Mark those heat sources, and plan the first shelf above the floor and the shelf backs clear of the wall.
The door deserves its own line. NKBA’s kitchen entry guideline recommends a clear doorway opening of at least 32 inches, and its access standard says 34 inches, with the opening measured between the face of the door and the stop with the door open 90 degrees. That guideline is about a kitchen entry, so use it as a measuring method for any doorway rather than as a pantry code. A Home Decorators Collection specification guide gives a related check for roll-out trays: leave enough clearance for doors to open at least 90 degrees when placing a cabinet next to a wall.
Measure the things you will store
The 1947 Oregon State bulletin Patterns for Kitchen Cabinets describes the second set of measurements. Its planning method for a floor-to-ceiling cabinet groups the articles to be stored, assigns the groups to specific shelves, and requires the height of the tallest article in each group and the clearance needed between it and the shelf above. The bulletin is old and was written for Oregon rural homes, but the method is still the cleanest one in the pages we opened. Measure the tallest item in each group with a ruler, and write that number next to the group on your sketch before you pick any shelf sizes. The spacing calculation then comes from those numbers. For pantry shelving units whose makers state their sizes, see our guides to small kitchen pantry shelving and 12 inch wide over-the-door pantry organizers.
Convert the readings into shelf sizes
Stock sizes limit what you can order. The Container Store’s Elfa component guide lists ventilated shelves in 12, 16 or 20 inch depths, with shelf baskets 16 inches deep. Elfa’s own wire shelf page recommends the 12 inch depth for narrower spaces like hallways and shallow pantry storage, and the 16 and 20 inch depths for linen closets or standard closet storage. It also says the wire shelf can be cut to width with a metal saw or angle grinder, and that you should mount the brackets first and then cut the shelf to the desired width if needed. ClosetMaid’s bracket sheet has separate 12 and 16 inch positions, and its installation tips say wire shelving can be cut with a bolt cutter or hacksaw.
Freestanding wire units add a measuring trap. The Shelving.com size guide distinguishes a list dimension, the nominal size used for ordering, from an outer dimension, the footprint, and an inner dimension, the clear space between posts. In its depth chart, a shelf with a 12 inch list depth has an inner depth of 9.375 inches, which is 2.625 inches less. In its width chart, a 36 inch list width has an inner width of 33.063 inches. The guide says its leveling feet add about 0.5 to 1.0 inch of height. Compare your items with the inner numbers, and compare the space you measured with the outer ones.
| List size (inches) | Outer (inches) | Inner clearance (inches) | Difference list minus inner |
|---|---|---|---|
| Depth 12 | 12 | 9.375 | 2.625 |
| Depth 18 | 18 | 15.375 | 2.625 |
| Depth 24 | 24 | 21.375 | 2.625 |
| Width 36 | 35.625 | 33.063 | 2.937 |
| Width 48 | 47.625 | 45.063 | 2.937 |
Fit a modular system wall to wall
Modular systems sell in sections, so the measured wall width has to be matched to a total. Elfa’s Classic planning guide says its frame, top track and standards come in three standard section widths, 45, 60 and 90, and lists the total width of the solution for one to five sections. The guide says the table includes end stops on the top track, 4 mm on each side. It also says that when standard widths are not enough, you can cut products in a section to make it narrower than standard, and it lists the top track, wire shelf, closet rod, standard and wire shelf basket as cuttable.
The totals are in millimeters. The table converts three wall widths that we assume, divided by 25.4 to go between inches and millimeters, and finds the closest totals below and above each wall from the guide’s table.
| Wall width (inches, assumed) | In millimeters | Largest total not over the wall | Smallest total over the wall |
|---|---|---|---|
| 30 | 762 | 641 mm (1 section of 60): 121 mm, or 4.76 inches, left over | 936 mm (1 section of 90): 174 mm, or 6.85 inches, too wide |
| 48 | 1,219 | 936 mm (2 sections of 45): 283 mm, or 11.15 inches, left over | 1,248 mm (2 sections of 60): 29 mm, or 1.13 inches, too wide |
| 72 | 1,829 | 1,392 mm (3 sections of 45): 437 mm, or 17.2 inches, left over | 1,855 mm (3 sections of 60, 2 of 90 or 4 of 45): 26 mm, or 1.03 inches, too wide |
On the 48 inch and 72 inch walls, the next standard total is only about an inch too wide. By the guide’s own statement, trimming the cuttable parts makes a section narrower, so a trim of roughly an inch fits a wall that would otherwise leave 11 or 17 inches empty. That is the reason to measure to a fraction of an inch: a 29 mm miss decides between trimming and leaving a gap. On the 30 inch wall the standard totals leave a wide gap or a wide overrun, which suggests the cut-to-fit route or a different combination. The guide is for Elfa Classic only, so check another maker’s section widths before you use the same arithmetic.
If it is a walk-in pantry: the aisle
A walk-in pantry adds an aisle to the measurements. NKBA’s kitchen walkway guideline recommends a width of at least 36 inches, and the Access Board standard sets a clear width of 36 inches minimum for walking surfaces on an accessible route and a clear floor space of at least 30 by 48 inches. Neither is a pantry rule. They are the closest figures in the pages we opened, so 36 inches serves as the reference here. The aisle is the room width minus the shelf depth on each side. The widths below are our assumptions, and the depths come from the Elfa and ClosetMaid lists.
| Room width (inches, assumed) | Aisle with 12 inch shelves on both sides | Aisle with 16 inch shelves on both sides | Aisle with 20 inch shelves on both sides |
|---|---|---|---|
| 48 | 48 − 24 = 24 | 48 − 32 = 16 | 48 − 40 = 8 |
| 60 | 60 − 24 = 36 | 60 − 32 = 28 | 60 − 40 = 20 |
| 72 | 72 − 24 = 48 | 72 − 32 = 40 | 72 − 40 = 32 |
Against the 36 inch reference, only the 60 inch room with 12 inch shelves and the 72 inch room with 12 or 16 inch shelves pass. If the aisle comes up short, put the deeper shelves on one wall only: in the 60 inch room, 20 inch shelves on one side leave 60 minus 20 = 40 inches. Add the door swing before you finalize. A door that swings into the aisle takes part of it.
Find the studs and plan the supports
A wall-hung run needs support points. The Tile Redi niche sheet says the distance between the center lines of two adjacent studs generally is 16 inches. ClosetMaid’s bracket sheet says the distance between brackets cannot exceed 32 inches, and the Elfa guide puts brackets at each end of a shelf and at a maximum of 36 inch intervals. Those limits belong to those products. With one bracket at each end, which is our simplification, the number of brackets for a run of length L is the whole number at or above L divided by the limit, plus one. For 72 inches that gives 4 brackets under the ClosetMaid limit (72 ÷ 32 = 2.25, so 3 gaps) and 3 under the Elfa limit (72 ÷ 36 = 2, so 2 gaps). Mark the stud centers on your sketch, then see which bracket positions land on them.
A checklist to take into the pantry
- Draw a plan and one sheet per wall. Include frames and fractions of an inch.
- Measure floor to ceiling at several points and write down the lowest, including soffits.
- Measure wall to wall at the height of each planned shelf, in at least two places. Circle the smallest.
- Measure depth from the back wall to the front of the opening or door stop.
- Measure the doorway between the face of the door and the stop with the door open 90 degrees, and sketch the swing.
- Mark pipes, outlets, switches, vents, radiators and heat sources.
- Find the studs and mark their centers.
- Measure the tallest item in each group you will store, and note the clearance you want above it.
- Choose the shelf depth and compare list, outer and inner sizes for any freestanding unit.
How we chose
We looked for pages that describe a measuring step, a clearance, a stock size or a mounting limit. We opened fourteen pages on 2026-10-21: two IKEA planning documents, the NKBA Kitchen Planning Guidelines, the U.S. Access Board standards page, two ClosetMaid documents, two Elfa pages, the Container Store Elfa component guide, the Shelving.com size guide, a Texas A&M AgriLife Extension publication, the 1947 Oregon State bulletin, the Tile Redi niche sheet and a Home Decorators Collection guide. A statement went into the guide only when we found it in the text of the page. Maker documents supply stated sizes for their own products. Where a rule is ours, such as using the smallest reading, we say so. Every wall width, room width and other number in a table that is not from a page is marked as assumed.
Mistakes to avoid
- Measuring once. IKEA asks for readings from at least two places and says to measure more than once.
- Using the list size of a freestanding unit as the clearance. The Shelving.com chart shows a 12 inch list depth with 9.375 inches between posts.
- Forgetting heat sources. Texas A&M says to keep food away from the range, oven, water heater, dishwasher and hot pipes.
- Measuring the door opening with the door closed. The NKBA guideline measures it between the face of the door and the stop with the door open 90 degrees.
- Applying one maker’s section widths or bracket limits to another maker’s parts. The Elfa table and the ClosetMaid and Elfa bracket limits describe those products.
What we could not verify
What the sources do not say
None of the pages we opened gives a pantry-specific measuring procedure, a standard pantry size, a required aisle width for a walk-in pantry, or a distance between shelf backs and walls. The IKEA documents describe kitchens, and the NKBA and Access Board figures describe kitchen entries and accessible routes. The smallest-reading rule is ours. The Elfa section table is in millimeters and is specific to Elfa Classic. The sources give no weight limit for a pantry shelf, so this guide makes no load claim. The Shelving.com page is a retailer chart, and it supplies only stated sizes here.
Frequently asked questions
What measurements do I need for pantry shelves?
The width, height and depth of the space, the doorway opening, and the position of anything that sticks out of the walls or gives off heat. Add the tallest item in each group of food you plan to store.
Which reading do I use if the width changes along the wall?
None of the pages we opened says. The smallest reading is our choice, because a shelf that fits the narrowest point fits along the whole wall.
How deep should the shelves be for a narrow pantry?
Elfa recommends 12 inch wire shelves for narrower spaces and shallow pantry storage, and lists 16 and 20 inch depths for linen closets and standard closets.
Can I cut wire shelving to fit?
Elfa says its wire shelf can be cut to width with a metal saw or angle grinder, and ClosetMaid says wire shelving can be cut with a bolt cutter or hacksaw. Follow the instructions for the product you buy.
How far apart should the supports be?
ClosetMaid’s bracket sheet gives a 32 inch maximum between brackets, and Elfa gives a 36 inch maximum interval, each for its own product.
Bottom line
Sketch the space, measure each dimension twice, mark the obstacles and heat sources, and match the smallest reading to a stock size.
Sources
- https://www.ikea.com/us/en/files/pdf/7a/a7/7aa7e3c8/ikea_how-to-measure-your-kitchen.pdf (opened 2026-10-21)
- https://www.ikea.com/ca/en/rooms/kitchen/how-to/how-to-plan-and-buy-your-kitchen-pub2242a879/ (opened 2026-10-21)
- https://media.nkba.org/uploads/2022/05/Kitchen-Planning-Guidelines.pdf (opened 2026-10-21)
- https://www.access-board.gov/ada/ (opened 2026-10-21)
- https://pdf.lowes.com/productdocuments/d1af380f-0c6e-4e7d-92b6-c4cde568f53d/50039299.pdf (opened 2026-10-21)
- https://images.homedepot-static.com/catalog/pdfImages/90/90404e96-cb01-4dd8-87a5-e537154545e8.pdf (opened 2026-10-21)
- https://elfa.com/en/measure-and-plan/classic-planning-guide (opened 2026-10-21)
- https://elfa.com/en/products/classic-by-elfa/top-hang/storage-functions/wireshelf-452725 (opened 2026-10-21)
- https://www.containerstore.com/medialibrary/pdf/WF729311_DIG_Elfa_Component_Pricing_Guide-HRspreads.pdf (opened 2026-10-21)
- https://www.shelving.com/pages/wire-shelving-size-guide (opened 2026-10-21)
- https://agrilifeextension.tamu.edu/wp-content/uploads/2025/04/safe-home-food-storages.pdf (opened 2026-10-21)
- https://ir.library.oregonstate.edu/downloads/xs55mc43w (opened 2026-10-21)
- https://tileredi.com/cdn/shop/files/InstallationInstructions_RediNiche.pdf (opened 2026-10-21)
- https://images.thdstatic.com/catalog/pdfImages/19/19ce6975-51fc-4571-aeee-4fa718366225.pdf (opened 2026-10-21)
As an Amazon Associate we earn from qualifying purchases.