How to Measure a Laundry Room for Storage
As an Amazon Associate we earn from qualifying purchases.
How to measure a laundry room for storage comes down to three sets of numbers: the room itself (ceiling height, wall lengths and openings), the fixed items in it (machines, outlets, pipes and vent), and the floor space you must keep open. The National Kitchen & Bath Association’s field-measurement chapter sets out the method, ClosetMaid and Elfa explain how a reading becomes shelving, and appliance makers publish the machine figures. This guide puts them in an order, adds a worksheet, and shows the arithmetic that turns readings into shelf and cabinet sizes.
Quick answer
- Measure in inches only, take ceiling height in at least three places about 12 inches out from the wall, and measure wall lengths at both low and high points. The NKBA text says rooms are never square.
- Measure window and door openings to the outside of the trim, and record outlet and plumbing centerlines from the wall.
- Take machine sizes and spacing from the installation sheet. The two sheets we opened disagree on side spacing, so use the one for your model.
- Plan a clear floor space of 30 by 48 inches at each machine, the ADA size, and 48 inches of floor space in front of it if you want to follow the UD Project specification.
- Check that your wall segments add up to the wall length, then convert: cabinets and wire systems come in fixed steps, so the leftover is a number to plan for.
Before you measure: tools and units
The NKBA course text, an extract from Kitchen & Bath Drawing: Documents, Drafting, and Presentation, third edition, begins with a rule on units. It says to “measure the space in inches or millimeters only,” because converting from feet and inches later invites a critical error. For a home project, that means writing 94¾ and not 7 feet 10¾ inches. ClosetMaid’s guide makes the same point about the first step in a closet job: “Use a measuring tape to find your closet measurements.”
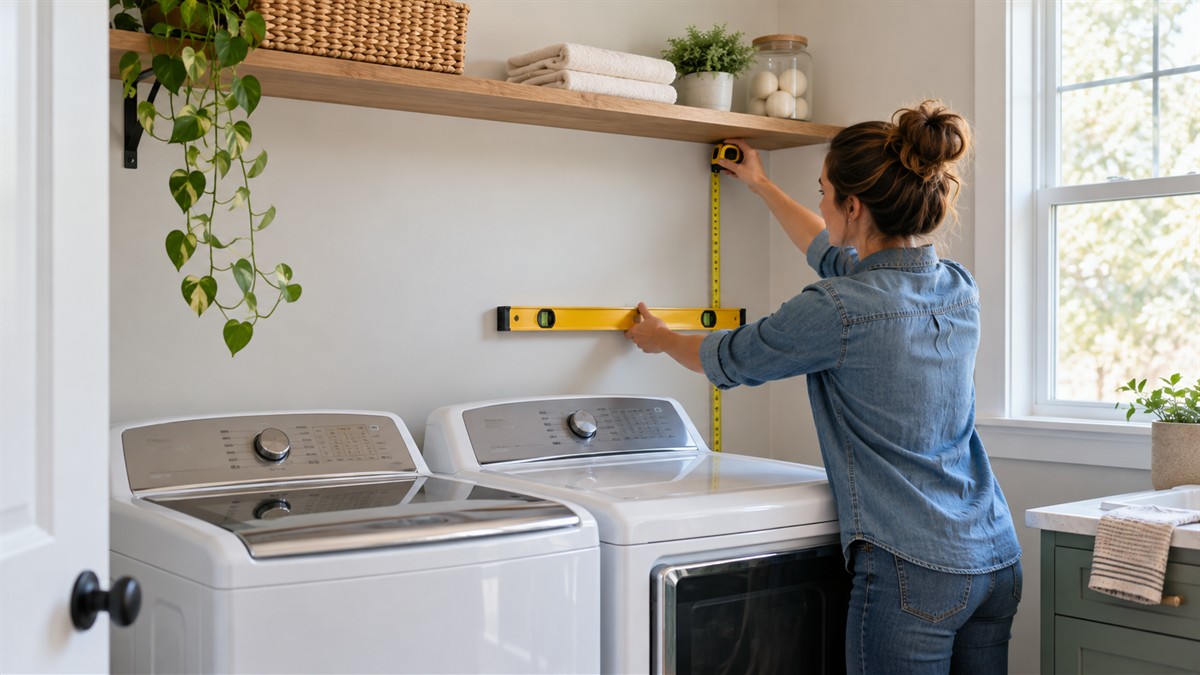
The NKBA equipment list is built for professional site visits, and a homeowner needs only part of it: a tape measure at least 25 feet long with a 1 inch blade, a small framing square, a level, pencils, a calculator, masking tape, a flashlight, a camera and a small step ladder. The text also warns that existing finishes such as tile, glass or mirrors can interfere with tape measures and laser tools. It lists the items to record, which we turn into the worksheet in Step 4 and the order of work near the end of this guide. Its closing advice for the whole job is blunt: “Always avoid designing or planning the space before accurate measurements are taken.”
Step 1: Ceiling height
The NKBA text puts ceiling height first because it is easy to overlook. It says to take the height in multiple places, “at least three locations,” about 12 inches out from the wall, and “Do not assume that a room is square or that the walls are straight.” It describes three ways to read a ceiling: mark a midpoint on the wall and measure ceiling to mark, then mark to floor; push the tape down from the ceiling against the wall; or push the tape up from the floor, repeating at several spots to see how level the ceiling is. A one-inch-wide tape stands up better than a narrow one.
The reading that counts is the lowest one. The NKBA cabinet chapter lists tall cabinets at 84, 90 or 96 inches high including the toe kick, and says “Tall cabinets should be planned to accommodate the finished ceiling height.” Take three readings that are our own example, not a real room: 96.00 inches at the left wall, 95.50 at the center and 94.75 at the right wall. The lowest is 94.75, and the table compares it with each NKBA height.
| Tall cabinet height (inches) | Lowest reading minus height | Fits? |
|---|---|---|
| 84 | 94.75 − 84 = 10.75 | Yes |
| 90 | 94.75 − 90 = 4.75 | Yes |
| 96 | 94.75 − 96 = −1.25 | No, 1.25 inches too tall |
A room that reads 96 inches on one wall can still reject a 96 inch cabinet. The spread between the highest and lowest reading here is 96.00 − 94.75 = 1.25 inches. The NKBA text also says to check how level the floor is, and cites reports of floors sloping up to two inches over twelve feet. Spread over a 36 inch cabinet, that would be 2 × 36 ÷ 144 = 0.5 inch, a figure from the cited slope and our own arithmetic.
Step 2: Wall lengths and openings
For each wall, the NKBA text says to take the overall length “at both low and high points,” because the readings can reveal that a wall is not plumb. Window and door openings are measured to the outside of the trim casing, since that is the area to avoid. The text adds that the sum of the pieces across the wall should equal the overall wall length. It also asks for the thickness of wall coverings, noting that drywall can be ½ or ⅝ inch thick, the width of trim casing, and the height of window sills, because work surfaces can collide with low windows.
Corners come next. The NKBA check is a 36–48–60 triangle: mark 36 inches out on one wall and 48 inches out on the adjacent wall, then measure between the marks. A reading of 60 inches means the corner is square, and any other reading means it is out of square and should be noted. The text sums up the reason in one line: “rooms are never square, walls are never plumb, and floors are never level.”
The segment check is simple addition. The example wall below is 120.00 inches long overall, which is our own example. If the pieces do not add to the overall length, re-measure the shortest one first.
| Segment (left to right) | Length (inches) |
|---|---|
| Corner to window trim | 14.00 |
| Window, outside of trim to outside of trim | 36.00 |
| Window trim to door trim | 18.50 |
| Door, outside of trim to outside of trim | 31.50 |
| Door trim to corner | 20.00 |
| Sum | 14.00 + 36.00 + 18.50 + 31.50 + 20.00 = 120.00 |
A sum of 119.25 would leave 0.75 inch unexplained, and the cause is usually one misread tape. Write each number down as you take it, since the NKBA forms also ask for window and door positions in relation to the floor, the ceiling and both wall corners, and for the location of door hardware.
Step 3: Outlets, pipes, vent and light
The NKBA text tells measurers to record the centerlines of power outlets and electrical devices, measured to the center of the outlet or junction box, and to note where ceiling fixtures are. For plumbing it says to “look inside every cabinet,” because the center of a sink may not be where the drain leaves the wall. The same list covers mechanical items such as duct runs, floor vents, registers and radiators. In a laundry room, add the washer’s water valves, the drain, the dryer vent and the dryer outlet to your sketch.
Why does the position matter for storage? Machine makers publish the numbers. The Maytag dimension guide we opened lists planning dimensions for the water inlet valves, the power cord, the drain hose outlet and the drain hose length, each measured from a side or from the floor. The LG sheet says the power outlet must be within 60 inches of either side of the washer, and that the plug must stay easy to reach. A shelf unit placed in front of an outlet or valve can block both, so mark them on the wall sketch before you choose where storage goes.
Step 4: Machine sizes and spacing
Read the installation sheet for your machines and write down the figures it gives, and then measure the machines yourself as a check. The two documents we opened show what to expect. The LG installation sheet gives 56 inches as the minimum vertical space from the floor to overhead shelves, cabinets and ceilings, and minimum clearances of at least 1 inch at the sides and 4 inches behind the unit for water lines and airflow. The Maytag guide lists a height with the lid open of about 55¾ to 56⅜ inches (1415 to 1432 millimeters). It says its washer was tested for installation with 0 inches of clearance on the sides, and it advises adding 1 inch on all sides to reduce noise transfer.
With the lowest ceiling reading from Step 1, the height left above that 56 inch minimum is 94.75 − 56 = 38.75 inches in our example room. Both documents tell the reader to allow for the walls, doors and floor moldings around the machine. We cannot say which spacing suits your model, because the numbers are model figures from two makers who disagree. If a machine is going into a recessed area or a closet, the Maytag guide shows a ventilation-opening diagram for the door. Our guide to closet organizing ideas for small spaces covers the shelf side of that situation.
The worksheet below turns the machine data into five numbers you need before shelving goes up.
| Item | What to record | Where the method comes from |
|---|---|---|
| Machine height, lid closed and open | Both figures, in inches | Installation sheet; the Maytag guide gives a lid-open height |
| Machine width and depth | Cabinet only, without hoses | Installation sheet or a tape |
| Side clearance | The figure on your sheet | LG: 1 inch; Maytag: 0 stated, add 1 inch for noise |
| Rear clearance | Space behind for hoses and vent | LG: 4 inches |
| Overhead height | Floor to the lowest shelf, cabinet or ceiling | LG: 56 inches minimum on its sheet |
Step 5: Floor space to keep open
Storage that crowds the floor in front of the machines makes the room hard to use. The ADA standards set a clear floor space of 30 inches minimum by 48 inches minimum. The Access Board’s guide to washers and dryers says the clear floor space must be centered on the appliance and positioned for a parallel approach, and that enclosures, including doors when open, “cannot overlap or obstruct the clear floor space.” These apply to covered facilities, not a private laundry room, so treat them as a planning reference.
The UD Project’s residential specification goes further for laundry. Its Chapter 8 asks for at least 48 inches of floor space in front of the machines, and it allows that space to be in a hallway or another room when the machines are in a closet. It also asks that washers and dryers sit at least 18 inches from any corner, including door-frame corners. A 60 inch turning radius applies if the laundry area is in a room and not a closet. The table below carries the 48 inch figure because it is the UD Project value and matches the 48 inch length of the ADA clear floor space.
The depth budget is a formula: wall-to-wall distance needed = machine depth + clear space in front + storage depth. The numbers in the table are an example layout of our own, with the machines against one wall and storage on the opposite wall. We assume a machine depth of 30 inches, which is not a model figure, and a room 96 inches wall to wall.
| Storage depth (inches) | Needed: 30 + 48 + depth | Room: 96 | Result |
|---|---|---|---|
| 12 (standard wall cabinet depth in the NKBA and cabinet-maker guides) | 90 | 96 − 90 = 6 | Fits with 6 inches spare |
| 16 | 94 | 96 − 94 = 2 | Fits with 2 inches spare |
| 24 (standard base cabinet depth) | 102 | 96 − 102 = −6 | Short by 6 inches |
Step 6: Turn the readings into fits
Storage comes in steps, and the steps decide how much of your measurement you can use. Two examples from the pages we opened show the method.
Wire systems. Elfa’s planning guide sells its Classic system in sections of three standard widths, 45, 60 and 90, with the total width of the solution listed for one to five sections, and with the end stops on the top track included in those totals. It also says several products, among them the top track, wire shelf, closet rod and standards, can be cut to a narrower width. ClosetMaid’s specification says its wire shelves should be cut shorter than actual wall measurements, between 0.5 and 1.375 inches shorter, so the gap you leave is part of the plan. ClosetMaid’s guide also notes that ceiling height affects where shelving goes, and that wall length and closet width or depth affect how much shelving and hardware you need.
| Sections | Width 45 (inches) | Width 60 (inches) | Width 90 (inches) |
|---|---|---|---|
| 1 | 19.2 | 25.2 | 36.9 |
| 2 | 36.9 | 49.1 | 73.0 |
| 3 | 54.8 | 73.0 | 108.9 |
| 4 | 73.0 | 97.3 | 145.2 |
The inch values divide Elfa’s millimeter totals (for example 1855 mm) by 25.4. Take an open wall segment of 84 inches, which is 2133.6 millimeters. The largest total in the table that fits is 73.0 inches, which is 1855 mm, and three combinations reach it: four sections of width 45, three of width 60, or two of width 90. The leftover is 84 − 73.0 = 11.0 inches. Cutting the top track and shelves, as Elfa allows, is the way to use some of that gap.
Wall cabinets. The NKBA cabinet chapter says wall cabinets are generally 12 inches deep and limited to 36 inches wide, and are typically installed with the bottom of the case 54 inches above the finished floor, which may vary with user needs. The Luxxe specification guide we opened lists wall cabinets with single doors 9 to 21 inches wide and with double doors 24 to 36 inches wide, in 3 inch steps, and says a minimum filler of ¾ inch is needed between a side wall and a cabinet so the doors can open. Take a wall segment that sits between two side walls. Available width = segment − 2 × 0.75. The cabinet run is the largest multiple of 3 that fits, and the remainder is filler.
| Wall segment (inches) | Available: segment − 1.5 | Largest run in 3 inch steps | One way to build it | Leftover for fillers |
|---|---|---|---|---|
| 84.00 | 82.50 | 81 | 36 + 36 + 9 | 1.50 |
| 61.25 | 59.75 | 57 | 36 + 21 | 2.75 |
| 30.50 | 29.00 | 27 | 27 | 2.00 |
These examples assume a 12 inch deep cabinet in the 30 inch height class, because the single-door and double-door widths above are listed for it. A different height class lists a different set of widths. For shelf options once you know the width, see our guide to shelves for a small room.
How to decide: the order of work
- Draw a rough sketch of the room and label each wall.
- Read the ceiling height in three places and keep the lowest.
- Measure each wall at a low and a high point, then measure the openings to the outside of the trim and check that the pieces add up.
- Check the corners with the 36–48–60 triangle.
- Record outlet and plumbing centerlines, the vent, the window sill height and the light fixtures.
- Copy the machine figures from the installation sheets and compare them with a tape.
- Subtract the clear floor space from the room depth to learn how deep the storage can be.
- Convert the open wall segments into section or cabinet widths and note the leftover.
- Take photos for reference, as the NKBA text suggests in its final inspection list.
How we chose
We read the pages listed below on 2026-10-21: the NKBA field-measurement and cabinet chapters, the ClosetMaid guide and specification, the Elfa planning guide, a cabinet-maker specification guide, two washer documents, the ADA text and the Access Board washer guide, and the UD Project laundry chapter. We kept the measuring rules and figures that each page states in plain words and quoted only sentences that we matched against the page text. The tables use our own arithmetic, and the room dimensions, the three ceiling readings and the assumed 30 inch machine depth are examples of our own.
What we could not verify: what the sources do not say
The pages we opened give no measuring procedure written for a laundry room. The NKBA text is written for kitchen and bath professionals. The pages do not say how far a shelf must sit above a particular washer, because that depends on the model, and the two machine documents we opened disagree on side spacing. They do not say how much storage a laundry room should have. A South Dakota State University Extension page on laundry room design could not be opened, and no university extension publication on measuring a laundry room was among the pages we could read. The floor-space figures come from accessibility documents for covered buildings and housing programs. They do not apply to a private room by law.
Frequently asked questions
What tools do I need to measure a laundry room?
The NKBA list starts with a tape measure at least 25 feet long with a 1 inch blade. Add a framing square, a level, a calculator, pencils, masking tape, a flashlight, a camera and a small step ladder.
Why measure the ceiling in three places?
The NKBA text says to take ceiling height in at least three locations, about 12 inches out from the wall, and not to assume the room is square or the walls are straight. The lowest reading governs which cabinet height fits.
How much clear floor space should I keep in front of a washer?
The ADA standards use 30 by 48 inches minimum for clear floor space, centered on the appliance. The UD Project asks for 48 inches of floor space in front of the machines. Neither sets a rule for a private laundry room.
Do I measure in feet or inches?
Use inches only. The NKBA text says to avoid feet-and-inches readings because converting them later risks a critical error.
How do I know if a corner is square?
Mark 36 inches along one wall and 48 inches along the other, then measure between the marks. A reading of 60 inches means the corner is square. Any other reading means it is out of square.
Bottom line
Measure in inches, trust the lowest ceiling reading, check that every wall adds up, and subtract the clear floor space before you pick a storage depth.
Sources
- https://elearning.nkba.org/wp-content/uploads/2023/12/Chapter-7-As-Built-Drawings-1.pdf (opened 2026-10-21)
- https://elearning.nkba.org/wp-content/uploads/2023/11/Chapter-6-Illustrating-CabinetryCasework.pdf (opened 2026-10-21)
- https://homedepot.closetmaid.com/en-US/Installation/Pages/how-to-guides.aspx (opened 2026-10-21)
- https://design.closetmaid.com/en-us/Documents/105723.14cmR6_ClosetMaidFixedWire.pdf (opened 2026-10-21)
- https://elfa.com/en-gb/measure-and-plan/classic-planning-guide (opened 2026-10-21)
- https://pdf.lowes.com/productdocuments/a1eb9084-5b50-46c6-8c75-617601687698/48070959.pdf (opened 2026-10-21)
- https://images.thdstatic.com/catalog/pdfImages/2a/2aa5113a-37a9-4d41-a594-ffa33bf7c1a3.pdf (opened 2026-10-21)
- https://images.thdstatic.com/catalog/pdfImages/0f/0f514b96-ddce-4687-9163-9b10685650b6.pdf (opened 2026-10-21)
- https://www.access-board.gov/ada/ (opened 2026-10-21)
- https://www.access-board.gov/ada/guides/chapter-6-washers/ (opened 2026-10-21)
- https://universaldesign.org/specifications/laundry (opened 2026-10-21)
Disclosure: As an Amazon Associate we earn from qualifying purchases.