How to Measure for a Corner Shelf
As an Amazon Associate we earn from qualifying purchases.
How to measure for a corner shelf comes down to four readings: how square the corner is, how far the shelf can run along each wall, the height of the shelf, and the room around it. Maker instruction sheets for corner shelves share one habit. They check the corner, draw level lines on both walls, and dry-fit the shelf before anything is fixed. This guide turns those steps into a measuring routine with a worksheet, so you can choose a shelf size that fits your corner before you buy.
Quick answer
- Check the corner first. Mark 36 inches on one wall and 48 inches on the other; if the line between the marks measures 60 inches, the corner is square.
- Measure how far the shelf can run along each wall from the corner point, and subtract anything in the way, such as trim, a switch or a door.
- Mark the shelf height in the corner and draw a level line along both walls, as the maker sheets we opened do.
- Dry-fit the shelf or its bracket in the corner before you glue, seal or drill anything.
How we chose
This is a measuring guide, so we looked for pages that describe a step a person can follow with a tape and a level. We opened each page on 2026-10-21. A Maine Department of Education carpentry lesson explains how to check a corner for square. Corner-shelf installation sheets from J. Thomas Home, Wilsonart, FlexStone, Onyx and a glass-shelf maker show how makers mark the walls and test the fit, and a Schluter FAQ page covers corners that are not square. We did not use blog posts or retail pages as support for any measurement.
Several sheets are written for shower walls and hardwood floating shelves. Where a step depends on the product, the text says so. Every quotation was matched against its page, and the numbers in the tables are our own arithmetic from the stated inputs.
Step 1: Decide what kind of corner shelf you want
The shape of the shelf decides what you measure. A triangular shelf has two equal legs that run along the walls and a diagonal front edge. An L-shaped shelf has a long side and a short side. The J. Thomas Home guide describes a corner shelf built from two floating shelves joined in an L, which can be configured on the left or right. The glass corner shelf sheet tells the installer to label one wall for the long side of the shelf and the other wall for the short side.
Deciding the shape first means you know which two numbers you need. For a triangle you need one leg length that fits on both walls. For an L you need a long length on one wall and a short length on the other, and you need to know which wall gets which.
Step 2: Check that the corner is square
Most corner shelves assume a 90-degree corner. The Wilsonart installation sheet for a shower corner shelf states that the corner needs to be close to 90 degrees, and that if it is not, modifications will be required for the shelf to fit. The FlexStone sheet says that if the corner is out of square, you trim one side of the shelf to get a tight fit.
Schluter, which makes corner shelves for tiled walls, says on its FAQ page that “Inside wall corners are rarely perfectly square.” It adds that the installation tabs on its SHELF-E allow some flexibility: the shelf can move further into the corner when the angle is greater than 90 degrees, or further out when it is less than 90 degrees. It also says you can consider the most common viewing angle of the shelf and square it to that wall surface, leaving the opposite wall a little further out. That advice is for one product, but it shows a choice you may face with any corner shelf: square the shelf to the wall people see first and accept a small gap on the other side.
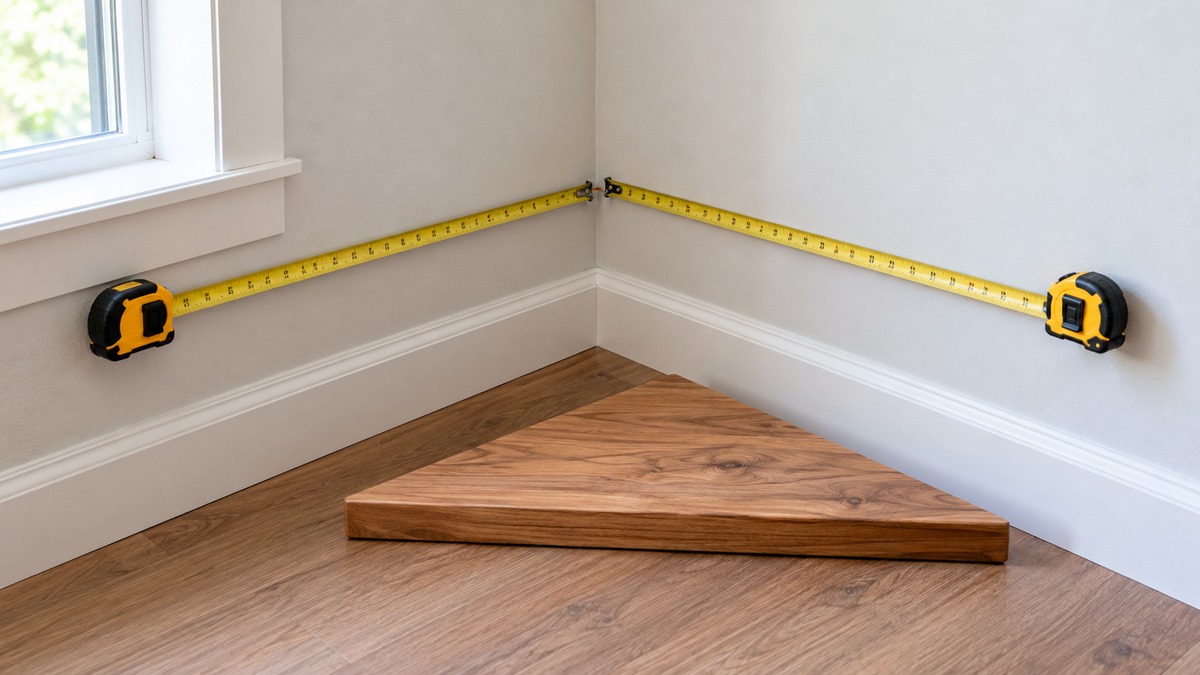
The 3-4-5 test checks a corner without special tools. A Maine Department of Education carpentry lesson on squaring corners explains that the same method can check an existing corner: “We can also use this to check that existing corners are square.” The lesson’s steps are simple. Choose an inside corner that should be square. Measure 36 inches along one wall from the corner and mark it. Measure 48 inches along the other wall and mark it. Then measure the straight line between the two marks. The lesson says that if the line measures exactly 60 inches, the corner is square, and that a longer or shorter line means the angle is more or less than 90 degrees.
The lesson says any multiple of 3 works for the first leg, with the second leg and the diagonal kept in the same 3-4-5 proportion. Compare the diagonal you measure with the expected value.
What a diagonal reading means
The lesson does not say how large an error matters, so the table below is our own arithmetic. It uses the law of cosines on the 36-inch and 48-inch marks to convert a diagonal reading to an angle, and then estimates the gap at the end of a 12-inch shelf leg with the wall angle off by that amount. The gap uses 12 multiplied by the tangent of the error.
| Diagonal reading (inches) | Corner angle (degrees) | Error from 90 (degrees) | Gap at the end of a 12-inch leg (inches) |
|---|---|---|---|
| 59.0 | 88.0 | -2.0 | 0.41 |
| 59.5 | 89.0 | -1.0 | 0.21 |
| 60.0 | 90.0 | 0.0 | 0.00 |
| 60.5 | 91.0 | +1.0 | 0.21 |
| 61.0 | 92.0 | +2.0 | 0.42 |
Half an inch of diagonal error is about one degree on these marks, and one degree opens a gap of roughly a fifth of an inch at the end of a 12-inch leg. A gap of that size is the sort of thing the maker sheets handle by trimming or sanding the shelf, or by filling the seam with sealant or caulk. A larger error is the reason Wilsonart says a corner may need modifications.
Step 3: Measure how far the shelf can run along each wall
With the corner checked, measure along each wall from the point where the two walls meet. Hold a rigid tape against the wall at the height where the shelf will sit, since that is the only place the shelf has to fit. Stop at the first thing in the way. That may be a door frame, a window casing, a light switch, an outlet or a shower control.
Write the two free lengths on a sheet of paper and label them wall A and wall B. The longest leg you can use is the shorter of the two, if you want a triangular shelf with equal legs. For an L-shaped shelf, the long side goes on the wall with more room, in line with the glass-shelf sheet’s instruction to label one wall for the long side and the other for the short side.
| Item | Wall A (inches) | Wall B (inches) |
|---|---|---|
| Corner to first obstacle | Your reading | Your reading |
| Shelf leg (from the product listing or sheet) | Leg length | Leg length |
| Spare room | Obstacle distance – leg | Obstacle distance – leg |
If either spare room figure is negative, the shelf does not fit on that wall. A negative figure of a fraction of an inch is a reason to look for a shorter leg or to measure again with the tape pressed flat.
Step 4: Work out the front edge of a triangular shelf
A triangular shelf with two equal legs has a front edge that is longer than either leg. The front edge is the hypotenuse of a right triangle, and the Maine lesson sets out the rule it comes from: the square of the hypotenuse equals the sum of the squares of the other two sides. For equal legs, the front edge is the leg multiplied by the square root of 2, which is about 1.414. The distance from the corner to the middle of the front edge is the leg divided by the same number.
| Leg length (inches) | Front edge (leg × 1.414) | Corner to middle of front edge (leg ÷ 1.414) |
|---|---|---|
| 8 | 11.3 | 5.7 |
| 10 | 14.1 | 7.1 |
| 12 | 17.0 | 8.5 |
| 14 | 19.8 | 9.9 |
| 16 | 22.6 | 11.3 |
The table is arithmetic, not a product specification. A listing may describe a shelf by its leg length, by its front edge, or by the width of its back, so check which one a listing means before you compare it with your reading. The pages we opened do not define a standard way for makers to state a corner shelf’s size.
Step 5: Mark the height and draw level lines
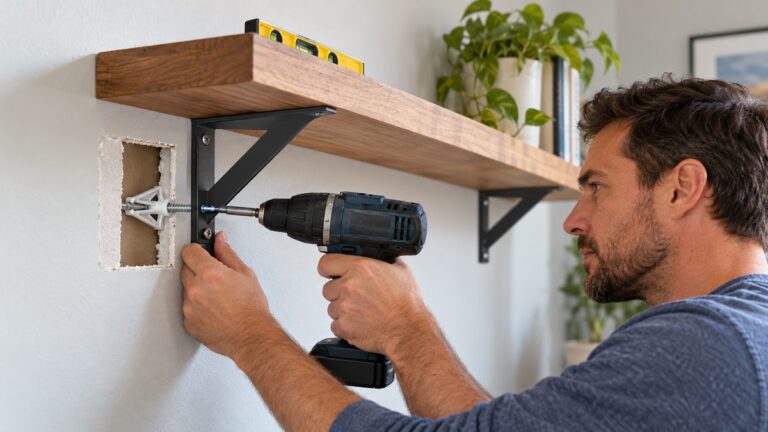
Maker sheets agree on how to mark the height. The J. Thomas Home guide tells the installer to pick the height for the shelves, mark that spot in the corner, and use a level to draw a straight line across both walls from that point. The FlexStone sheet has the installer position the bracket in the corner at the desired height and mark level lines in pencil. The glass-shelf sheet has the installer draw two level lines about as long as the shelf, one on each wall.
The Onyx corner floating shelf sheet works the other way round. It says to “Hold the shelf up in the corner of the shower at the desired height” and mark the wall just above the shelf. It then has the installer measure down 3/4 inch from that mark and draw a line to position the mounting bracket. That offset is specific to the Onyx product. The general point is that the mark on the wall and the line for the hardware are not always the same line, so read the sheet for your product before you transfer a height.
The pages we opened do not agree on one height. For help choosing it, see our guide to corner wall shelves for a living room, which covers the kinds of shelf these measurements are for.
Step 6: Allow for the bracket and the back of the shelf
A bracket does not always sit in the corner itself. The J. Thomas guide says that the bracket will not sit all the way in the corner. For that product, the installer measures from the shelf edge to the bracket edge and marks the same distance from the corner on the wall line. That means the position of the hardware is a measured offset from the corner, not a guess.
The same principle applies to any shelf with a back panel or a thick edge. Measure the distance between the back of the shelf and the point where the hardware sits, and add or subtract it from your wall marks. If a sheet gives an offset, use the sheet’s figure, since the pages we opened give no general offset.
Step 7: Dry-fit before you fix anything
Every sheet we opened includes a dry fit. The Wilsonart sheet says to dry fit the corner shelf to ensure a good fit to the wall panels. The FlexStone sheet has the installer dry fit the shelf over the bracket before applying adhesive. The shower corner sheet hosted by Home Depot has the installer place the shelf in the corner over the bracket and determine if it fits with no gaps, trimming or sanding if necessary for a square fit. The J. Thomas guide has the installer slide the first shelf on to test the fit, and adjust the bracket if it is not snug in the corner.
A dry fit is your last chance to compare the measurements with the real shelf. Hold the shelf in place at the marked height. Check the gap along each wall with a thin card or a finger, and check that the shelf is level. If a gap is larger than you can fill, return to Step 2 and measure the corner again. For shower and wet-area shelves, the same sheet adds a spacing rule: ensure the shelf does not interfere with any physical operation of the shower, such as being too close to a grab bar.
A worked example
Suppose a bathroom corner has 14 inches of clear wall on one side before a window casing and 20 inches on the other side before a door frame. The 3-4-5 check gives a diagonal of 60.5 inches, which means the corner is about 91 degrees. From the table, a 12-inch leg would leave a gap of about 0.21 inch at the end of a leg.
The spare room is 14 – 12 = 2 inches on wall A and 20 – 12 = 8 inches on wall B. A triangular shelf with 12-inch legs fits, with its front edge at about 17.0 inches. Because the corner is slightly open, plan to trim, sand or fill the seam, as the maker sheets suggest, and do not choose a shelf whose back has no room to move. The same corner could not take a 16-inch leg, because 14 – 16 = -2 inches of spare room on wall A.
If the shelf is for a shower or bath, see our posts on the shower corner shelf and the bathroom corner shelving unit. For a bathroom counter, see corner shelves for a bathroom counter. If the walls will not take a drill, see adhesive corner shelves.
Mistakes to avoid
- Assuming the corner is square. Wilsonart says the corner needs to be close to 90 degrees, and FlexStone trims a side if it is out of square.
- Measuring at the wrong height. The shelf only has to fit where it sits, so take the wall reading at the shelf height.
- Ignoring what is on the wall. A switch, casing or door frame limits the leg length.
- Comparing a leg length with a front edge. A 12-inch leg has a front edge of about 17 inches.
- Skipping the dry fit. Every sheet we opened asks for one before any adhesive or sealant.
- Forgetting the offset for the bracket. The J. Thomas guide says the bracket does not sit all the way in the corner.
What we could not verify
The pages we opened do not give a tolerance for how far out of square a corner may be, and the table of gaps is our own arithmetic. They do not give a standard way to describe a corner shelf’s size, a standard bracket offset, or a general shelf height. The sheets cover shower panels, hardwood floating shelves and glass shelves, so their steps for sealing and fastening depend on the product. We did not use any page for weight limits or wall anchors, and nothing here is a fastening instruction. Follow the sheet that comes with your shelf for those steps.
Frequently asked questions
How do you measure for a corner shelf?
Check the corner with a 3-4-5 test, measure the free length along each wall at the shelf height, mark the height with a level line on both walls, and dry-fit the shelf before you fix it. The worksheet in Step 3 holds the readings.
How do you check that a corner is 90 degrees?
Mark 36 inches on one wall and 48 inches on the other, measured from the corner. The line between the marks should be 60 inches. A longer or shorter line means the angle is more or less than 90 degrees, according to the Maine Department of Education lesson.
What if my corner is not square?
The FlexStone sheet says to trim one side of the shelf to get a tight fit. The Wilsonart sheet says modifications will be required if the corner is not close to 90 degrees. The pages do not give a tolerance, so dry-fit the shelf to see the gap.
How long is the front edge of a triangular corner shelf?
For equal legs, about 1.414 times the leg length. A 12-inch leg gives a front edge of about 17.0 inches. Check whether a listing states the leg or the front edge before you compare sizes.
Does a corner shelf bracket sit in the corner?
Not always. The J. Thomas guide says its bracket does not sit all the way in the corner, so the installer measures an offset from the corner. Read the sheet for your product.
Bottom line
Square the corner with a 3-4-5 check, measure the free run on each wall at the shelf height, and dry-fit before you fix anything.
Sources
- https://www.maine.gov/doe/sites/maine.gov.doe/files/inline-files/CTE%20-%20Math%20in%20CTE%20Construction%20Squaring%20Corners%20-%2002.18.2025.pdf (opened 2026-10-21)
- https://www.jthomashome.com/content/corner-shelf-installation-guide.pdf (opened 2026-10-21)
- https://images.wilsonart.com/media/Technical_Resources/en_bb/nuance__corner_shelf_installation.pdf (opened 2026-10-21)
- https://pdf.lowes.com/productdocuments/e7eb2583-79cb-47d7-995c-3549b35e98f1/13598412.pdf (opened 2026-10-21)
- https://images.homedepot-static.com/catalog/pdfImages/f3/f3db97ec-7a5b-4ae6-af84-e8176499c341.pdf (opened 2026-10-21)
- https://images.homedepot-static.com/catalog/pdfImages/06/069bdf82-eab1-43bc-9d4a-6e0c1dd9f223.pdf (opened 2026-10-21)
- https://onyxcollection.com/wp-content/uploads/2023/07/Install-Corner-Floating-Shelf_1023.pdf (opened 2026-10-21)
- https://www.schluter.com/schluter-us/en_US/faq/install-the-shelf-e-inside-corner-not-square (opened 2026-10-21)
As an Amazon Associate we earn from qualifying purchases.