How to Organize a Closet With Shelves: Step by Step
Disclosure: As an Amazon Associate we earn from qualifying purchases.
How to organize a closet with shelves comes down to three decisions: what goes where, how each shelf is fastened, and how much weight each shelf carries. Start by sorting what you store, then give each shelf one job, and mount the shelves so they stay put. Start by deciding which items go on high shelves, which go at reach height, and which need a rod instead. Then install the shelves into wall studs or with rated anchors, and check the stated weight limit for each shelf before you load it. The steps below follow that order.
Quick answer
- Sort the closet by how often you use each item, then assign shelves by zone: everyday items at reach height, seasonal items up high.
- Mount each shelf into a wall stud or use anchors that the hardware instructions rate for your wall type.
- Read the stated weight limit for each shelf and treat it as a ceiling, not a target.
- Secure any tall or freestanding unit with anti-tip hardware.
Step 1: Empty the closet and sort by use
Take everything out before you plan anything. Make three piles: items you wear or use weekly, items you use a few times a year, and items you have not used in a long time. This sorting tells you where each shelf should go. Heavy things such as storage bins of books, boots, or dense bedding belong on lower shelves, where lifting and reaching are easiest and where a fall causes less damage.
Step 2: Measure the closet and mark the zones
Measure the wall width, the wall height, and the depth of the closet, and note where the light switch, vents, and door swing sit. Then divide the wall into zones on paper:
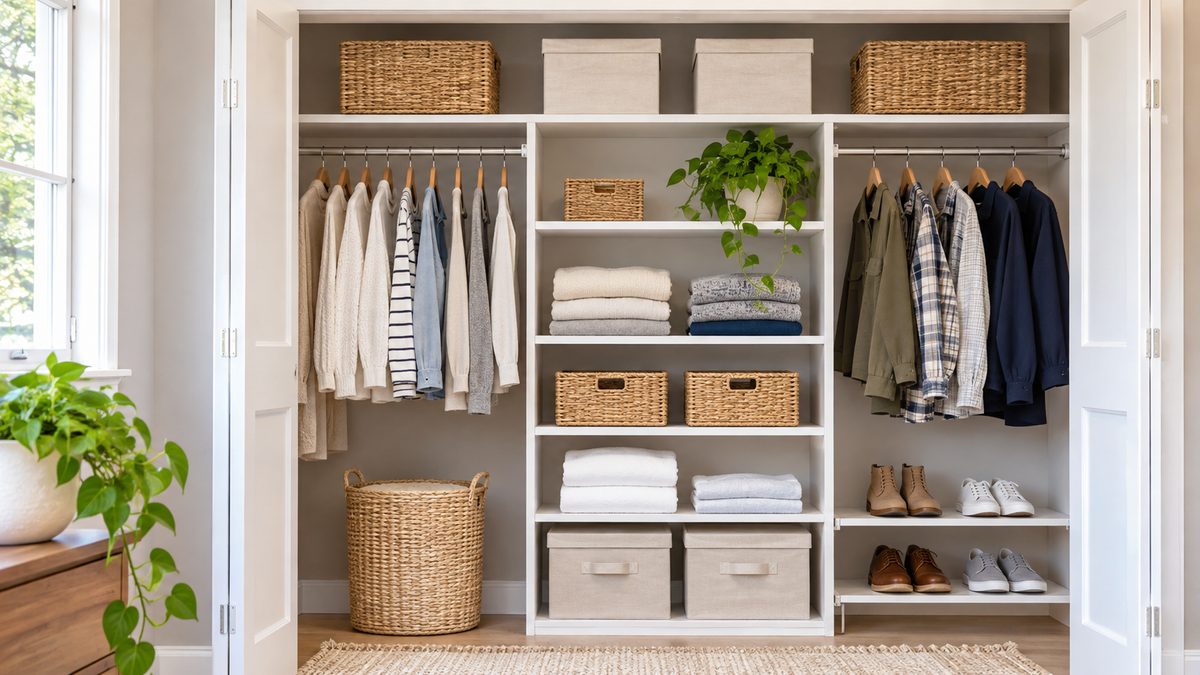
- Reach zone (roughly waist to shoulder height): folded clothes, daily bags, and shoe boxes you open often.
- Upper zone (above the reach zone): seasonal and rarely used items, stored in labeled bins.
- Floor zone: shoes and tall baskets. Keep heavy items low.
The sources we opened do not give a standard shelf height or spacing for closets, so use what you can reach comfortably and what fits your items. Do not assume a specific stud spacing until you find the studs (see Step 4).
Step 3: Choose shelves and check the stated limits
Before you buy or reuse shelves, look at the product’s own specifications and installation notes. Check three things:
- The stated weight limit, and whether it is per shelf or for the whole unit.
- Whether the limit assumes the shelf is fastened into studs.
- Which hardware is included, and whether the instructions call for a specific anchor type.
If a listing or manual does not state a limit, say so in your plan and load the shelf lightly until you know more. Do not treat a limit from one product as a limit for another.
Step 4: Find the studs and mark the wall
Use a stud finder, then confirm the location with a small test hole if the finder is unclear. The CPSC staff report on anchoring furniture says that a wood screw “is usually provided and must be installed in a stud.” It also explains why hardware matters: in its tests, the drywall anchors that were not designed for heavy loads were most vulnerable when the pull was not parallel to the wall. The report states that “Drywall anchors are strongest when pulled at an angle parallel to the wall (a shearing force).” That is a reason to use fasteners rated for the job, not a rule you can apply to your own wall.
Mark the stud centers with painter’s tape, level the mark, and drill pilot holes. If you cannot reach a stud where you need a shelf, use an anchor, and choose one the hardware or the anchor maker rates for your wall material.
Step 5: Identify the wall type
Closets can have drywall, plaster, or masonry walls, and each needs different fasteners. The sources we opened do not give anchor ratings for these materials. The AAP guidance on furniture tip-overs advises: “Consider using furniture and wall anchors that are metal (such as “L” brackets). Plastic can become brittle over time and break, causing anchors to fail.” If you are unsure what your wall is, check the hardware instructions or ask a building professional before you drill.
Step 6: Mount the shelves level and fasten them
Install the brackets or rails first, check them with a level, and then add the shelf boards. Tighten each fastener fully, then load the shelf and check it again after a day. A shelf that sags or pulls away from the wall is a sign that the fastening, the load, or the wall type needs another look.
For a closet with a hanging rod, keep the rod clear of the shelf edge so clothes hang freely. The sources we opened do not give a clearance measurement, so measure your own hanging items and allow room for them.
Step 7: Load the shelves by weight
Put heavy items on the lowest shelves and light items on the top. Keep the load spread across the shelf, not piled at one end. Use bins with handles, labels, and lids so that items are easy to find and easy to remove without pulling the whole stack forward.
| Item type | Where to put it | Why |
|---|---|---|
| Books, boots, dense bedding | Lowest shelf | Heavy; a fall does the least harm low |
| Folded clothes, daily bags | Reach zone | Used every week |
| Seasonal bins, spare linens | Upper zone | Used a few times a year |
| Shoes | Floor or lowest shelf in a shoe rack | Easy to reach and stack safely |
The table is a planning rule based on the zones above. It does not state a weight for any item.
Step 8: Secure tall or freestanding units
If your closet shelves are part of a tall unit or a freestanding rack, fasten it to the wall. The AAP page says: “Secure all furniture and mirrors with anti-tip devices.” It also says: “The heavier the furniture, the more anchors you should use to prevent it from tipping.” The page explains that tip-overs happen more often than many people expect, and that a heavy top, open drawers, or an unstable floor can all raise the risk. For a rack that stands on its own, bolting it to a stud or to a rated anchor is the safer choice.
Choose fasteners and anti-tip hardware from makers whose instructions you can read and check.
Step 9: Protect wood shelves from moisture
Closets can hold moisture, especially on exterior walls or in humid rooms. The Alabama Cooperative Extension guidance on furniture care warns that “Mildew is a gray-white mold that stains and rots fabric unless you remove it promptly.” It also advises: “Store wood furniture where it will dry out slowly.” That guidance is about salvaging furniture, not about closet shelves, so apply it with care. Wipe shelves dry, keep items off the wall surface when you can, and leave a small gap for air movement behind stacked bins.
Mistakes to avoid
- Mounting into drywall alone when a stud is available. The CPSC report says a wood screw “must be installed in a stud” in its guidance on furniture anchoring.
- Using a shelf limit from a different product. Limits differ by product and by whether the unit is fastened to studs.
- Stacking heavy bins on top shelves. Heavy loads high on a unit raise the tip-over risk the AAP page describes.
- Skipping anti-tip hardware on tall units. The AAP page says to secure all furniture with anti-tip devices.
- Storing damp items on wood shelves. The Alabama extension guidance notes that mildew stains and rots materials unless it is removed promptly.
How we chose
We chose the steps that the sources we opened support directly: anchoring into studs, using rated anchors, securing tall furniture, and protecting wood from moisture. Steps about closet layout, such as zone planning, are general planning advice, not findings from a source, and we say so where it matters. We did not rank products or pick a best shelf.
How we checked
We opened three non-retail sources on 2026-10-27 and checked each quote against the text of the page or report:
- U.S. Consumer Product Safety Commission, staff report TR-15/001, “Preliminary Evaluation of Anchoring Furniture and Televisions Without Tools” (May 2015). This is a staff report, and the report says it “has not been reviewed or approved by” the commission.
- American Academy of Pediatrics, HealthyChildren.org, “Preventing Furniture and TV Tip-Overs.”
- Alabama Cooperative Extension System, “Salvaging Furniture.”
We did not use retail pages, product listings, or review sites as sources for any claim in this article.
What we could not verify
- The sources we opened do not give shelf heights, shelf depths, or spacing for closets.
- The sources do not give load numbers for shelves or anchors. The sources we opened do not give a number for this.
- The sources do not rate anchors for plaster, brick, or tile walls.
- The sources do not address closet humidity levels or how much airflow a closet needs.
- The sources do not say how to organize a particular closet type, such as a walk-in or a reach-in with sliding doors.
FAQ
Where should I mount closet shelves?
Mount them into wall studs whenever you can. The CPSC staff report says a wood screw is usually provided and must be installed in a stud. If no stud is where you need it, use an anchor rated for your wall type.
How much weight can a closet shelf hold?
Use the stated limit from your shelf or bracket maker, and check whether it is per shelf and whether it assumes studs. The sources we opened do not give a number for this, so do not assume one.
Which items should go on the top shelf?
Seasonal and rarely used items belong on the top shelf, stored in labeled bins. Keep heavy items low, where a fall does less harm.
Do I need anti-tip hardware for closet shelves?
If the shelves are part of a tall or freestanding unit, yes. The AAP page says to secure all furniture with anti-tip devices, and to use more anchors as furniture gets heavier.
How do I keep wood closet shelves from getting moldy?
Remove damp items promptly and let wood dry out slowly. The Alabama Cooperative Extension guidance warns that mildew is a gray-white mold that stains and rots materials unless it is removed quickly.
Bottom line
Put heavy items low, everyday items at reach height, and seasonal items up high, and fasten every shelf into a stud or a rated anchor before you load it. If a shelf or tall unit has no stated limit or no anti-tip hardware, do not load it until you have them.
Related guides
- For depth and clearance before you buy, read our guide to standard reach-in closet depth.
- For shoe storage on a closet floor, see our small shoe rack picks for a closet floor.
- For weight limits and what a shelf can hold, see our guide to floating shelves that can hold weight.
- For ideas on a tight budget, read our small walk-in closet ideas on a budget.
Sources
- U.S. Consumer Product Safety Commission, “Preliminary Evaluation of Anchoring Furniture and Televisions Without Tools,” staff report TR-15/001 (May 2015). https://www.cpsc.gov/s3fs-public/pdfs/Tipover-Prevention-Project-Anchors-without-Tools.pdf. Opened 2026-10-27.
- American Academy of Pediatrics, HealthyChildren.org, “Preventing Furniture and TV Tip-Overs.” https://www.healthychildren.org/English/safety-prevention/at-home/Pages/Preventing-Furniture-and-TV-Tip-Overs.aspx. Opened 2026-10-27.
- Alabama Cooperative Extension System, “Salvaging Furniture.” https://www.aces.edu/blog/topics/emergency-handbook-home-family/salvaging-furniture/. Opened 2026-10-27.