How to Adjust Wire Shelving Height
As an Amazon Associate we earn from qualifying purchases.
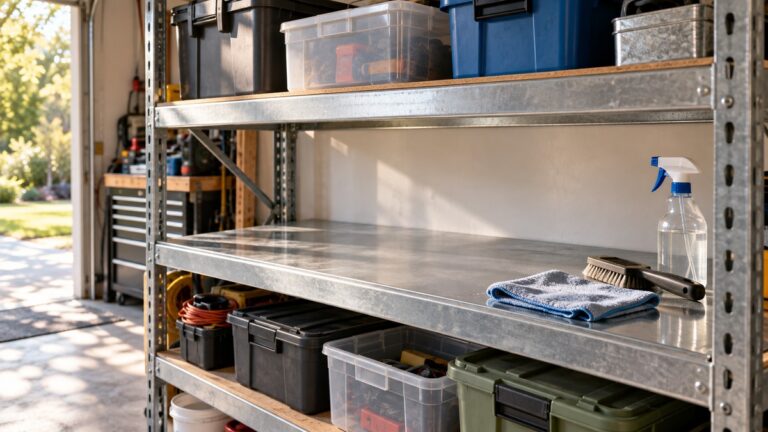
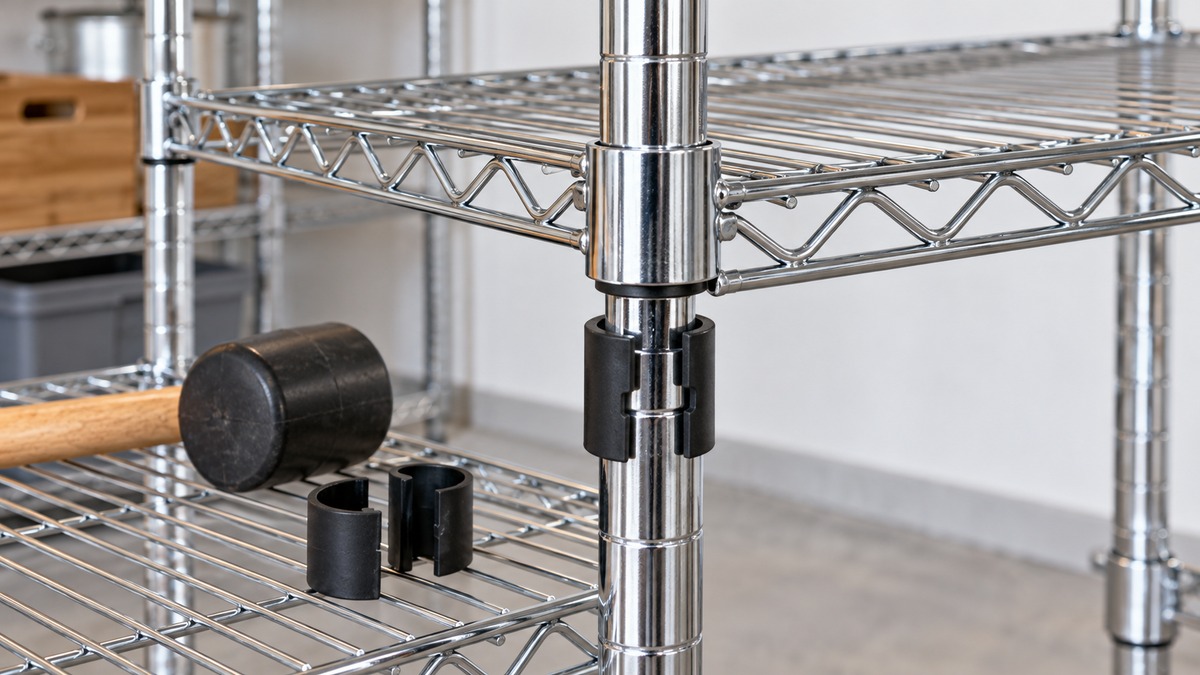
How to adjust wire shelving height comes down to moving the plastic sleeves that carry each shelf. On a freestanding post-and-sleeve unit, you unload the shelf, lift it clear, snap the sleeve pairs onto the grooves at the new height and set the shelf back down on all four posts. Closet systems work differently, with brackets that lock into uprights. This guide draws on sheets from Metro, Trinity, Seville Classics, Eagle, Salsbury, Rubbermaid and ClosetMaid, and plans a five-shelf layout with simple arithmetic.
Quick answer
- Count grooves from the bottom of the post and set every sleeve pair at the same groove on all four posts. Seville Classics says counting keeps each shelf consistent and even.
- Sleeve pairs go on with the arrow or small end up. Trinity says to listen for a click and to place only one pair on a pole at a time.
- Respect the end limits. Trinity keeps the lowest shelf below the third notch, and Eagle also limits the top shelf.
- Unload the shelf first. Seville Classics says not to move the system while it is loaded.
Which kind of wire shelving do you have?
Most freestanding wire units hold each shelf on a pair of two-piece plastic sleeves that grip a groove on every post. The Metro sheet puts the grooves 1 inch apart, and the Trinity manual describes slight horizontal indentations at 1 inch intervals. Other styles exist, and the table separates them because the steps differ.
| Type | How the height is set | Step between positions | Page |
|---|---|---|---|
| Freestanding post-and-sleeve | Two-piece sleeves snapped onto post grooves | 1 inch (Metro, Trinity) | Metro, Trinity, Seville Classics, Eagle |
| Quick-adjust shelf | Shelf clips on the post, with lock clips over the wire edge | Not stated | Uline |
| Adjustable closet system | Brackets inserted into uprights | Not stated | Rubbermaid |
| Closet track | Brackets on standards at the desired height | Not stated | ClosetMaid |
The sections below follow the table order. If your unit is a freestanding one, read the next three sections first.
Before you move a shelf
The sheets we opened describe assembly. None of them describes moving a shelf that is already built, so the steps below are our reading of how the parts work. The Seville Classics 4-tier sheet says not to move the system while it is loaded, so unload the shelf you are changing. The Regency stainless steel sheet warns that stainless edges may be sharp and says to wear gloves. A second person helps here, because one person has to hold a shelf while the other works on the sleeves.
Every shelf rides on the same four posts. A shelf can slide along the posts only until it meets its neighbor, so if the new height lies beyond a neighboring shelf you will need to lift that shelf off first. On a unit with two-piece posts, Trinity builds the lower shelves on the bottom poles and screws the top poles on later. The Shelving Inc guide says posts 64 inches and taller come in two pieces. If you have to reach a lower shelf past upper shelves, you may need to separate the pole sections.
Plan the new heights first
Heights are set by grooves, so plan in grooves. The sheets give several ways to keep count. Seville Classics says to count the number of grooves from the bottom of the pole to keep the height of each shelf consistent and even. Shelving Inc says to count notches on each post to ensure clips are level. The Regency sheet says every eighth groove is doubled, which gives you a landmark, and the Advance Tabco sheet says its posts are numbered for convenience in leveling a shelf.
Know where the grooves start. The Salsbury sheet says the top end of its post has the first groove about 1/2 inch from the end, and the bottom end has the first groove about 2-1/2 inches from the end. It says all four posts must face the same way when you fit the clips. That detail means groove number and height above the floor are not the same, so measure from the floor to the shelf surface once you are done.
The spacing between two shelves is the item height, plus headroom, plus the thickness of the shelf deck. The sheets we opened do not state headroom or deck thickness, so both are our own assumptions here. The assumptions are 2 inches of headroom, 1 inch of deck, and a unit that is 72 inches high, the height printed in the Trinity 6-tier manual. The groove number is treated as inches from the bottom of the post, which ignores the end offset above. Replace our figures with yours.
| Shelf | Item height under it (inches) | Spacing below it | Groove position, tight plan | Groove position after the top-shelf rule |
|---|---|---|---|---|
| 1 (bottom) | Start | Start at groove 2 | 2 | 2 |
| 2 | 12 | 12 + 2 + 1 = 15 | 2 + 15 = 17 | 17 |
| 3 | 16 | 16 + 2 + 1 = 19 | 17 + 19 = 36 | 36 |
| 4 | 10 | 10 + 2 + 1 = 13 | 36 + 13 = 49 | 49 |
| 5 (top) | 15 | 15 + 2 + 1 = 18 | 49 + 18 = 67 | 70 |
The Eagle sheet says the bottom shelf must be positioned below the third groove line from the bottom of the pole, and the top shelf above the third groove line from the top. On a 72-inch unit the third groove line from the top is at 72 − 3 = 69. The tight plan puts shelf 5 at 67, which is under that line, so we move it up to 70. The extra 3 grooves go into the gap under the top shelf, which becomes 70 − 49 = 21 grooves, a spare of 21 − 18 = 3. The bottom shelf at groove 2 passes the Eagle rule, and it also passes the Trinity rule that the lowest shelf should be lower than the 3rd notch.
A layout like this chains: moving one shelf shifts the room available to its neighbors. If you raise shelf 3 by 3 grooves to fit a taller item beneath it, shelf 3 sits at 39. The gap above it shrinks from 13 to 10 and no longer fits the 13 needed for the 10-inch items. The sleeve pairs cost nothing to move, but the total height does not grow, so check the whole stack before you start. For units that show adjustable-height options, see adjustable height shelves, and for a five-tier wire model see the Hyper Tough 5-tier wire shelving unit.
Step by step: moving a shelf on a post-and-sleeve unit
- Unload the shelf. Take off every item, because the Seville Classics sheet warns against moving the unit with a load on it.
- Mark the new groove. Count from the bottom of the post, or use a landmark such as a doubled groove. Write the groove number down for each shelf.
- Support the shelf. Have your helper hold the shelf by its sides. The sheets do not describe removing a seated shelf, so this step is our reading. The Regency sheet seats shelves with a mallet and towel, so a seated shelf may need a firm lift.
- Take the old sleeves off. Split sleeves snap together around the post, so they come away the way they went on. None of the sheets describes removing them. Keep the two halves together.
- Snap new sleeves on at the new groove. The Trinity manual says to place one pair at the desired level with the arrow facing up and the word TOP right side up, and to slide the pair until you hear a click. It says not to place more than one pair on a pole at a time. It adds that a very small gap between the two sleeves is normal.
- Match the other three posts. The Eagle sheet and the Trinity manual both say the heights must be identical on each post.
- Lower the shelf. Slide the shelf down so the corner collars sit over the sleeves. The Advance Tabco sheet taps lightly with a rubber mallet if necessary, and the Regency sheet uses a mallet and towel.
- Level the unit. The Metro sheet levels by adjusting the leveling feet on solid flooring.
Rules that limit where the shelves can go
Four sheets set rules about end positions, shelf count or post direction. The table puts them side by side. Where the figures use different words, the table keeps each sheet’s wording.
| Sheet | Rule |
|---|---|
| Metro and InterMetro | Units over 50 inches high must have at least three shelves, preferably four or more. Install the bottom shelf as low as possible. |
| Trinity | The lowest shelf should be lower than the 3rd notch from the bottom. |
| Eagle Industrial Group | Bottom shelf below the third groove line from the bottom of the pole. Top shelf above the third groove line from the top. |
| Salsbury | All four posts face the same way. Sleeve clips on the bottom shelf are fitted on the bottom end of the post. |
Metro’s anti-tip note also applies when you rearrange: it recommends an anti-tip wall bracket for high-traffic areas or earthquake-prone areas.
Quick-adjust shelves
The Uline Quick Adjust sheet uses a different attachment. Standard shelves sit on interlocking supports that snap around the post at a groove, wide end down. Quick adjust shelves sit on shelf clips, and a lock clip pushed over the wire edge holds the shelf in place. The sheet says that to remove the clip you push up on the lock clip. So to move a quick adjust shelf, you release the lock clip first, move the shelf clips to the new groove, and lock the shelf again. The sheet shows assembly rather than relocation, so that sequence is our reading.
Adjustable closet systems
Brackets and uprights replace sleeves in a closet system. The Rubbermaid instructions for its 6-10 ft adjustable closet system say to insert the brackets into the uprights at the desired locations, that the shelves are fully adjustable and require no cutting, and to confirm that the bracket locks are unlocked. It tells you to install the brackets and shelving at the top first and work down, and to lock each shelf into its brackets by sliding the plastic locking clip toward the back wall. To change a height, unlock the shelf, move its brackets to the new slot in the uprights and lock it again. That sequence is our reading of the installation steps.
ClosetMaid’s ShelfTrack works from the wall, with brackets attached at the desired shelf height. The how-to guide on its site gives two sets of hanging heights. One paragraph says typical shelf heights are 70 inches from the floor for long hanging and 84 inches and 42 inches for double or short hanging. Another section puts the double hang shelf at 85.5 inches and 42 inches, and long hang at 71.5 inches. The page does not explain the difference, so confirm the numbers against your closet before you drill. For a closet layout, see closet shelving systems.
| Hanging use | Height in one part of the guide (inches) | Height in another part (inches) | Difference |
|---|---|---|---|
| Long hang | 70 | 71.5 | 71.5 − 70 = 1.5 |
| Double hang, upper | 84 | 85.5 | 85.5 − 84 = 1.5 |
| Double hang, lower | 42 | 42 | 0 |
After the move
- Measure each post. Tape from the floor to the shelf surface on all four posts. A shelf that sits at different grooves on two posts will lean.
- Recount the grooves. Use the same counting method you used to plan, whether it is the doubled groove or the numbered post.
- Press the corners. The sheets seat shelves with a tap or a firm push, so check that each corner collar sits fully over its sleeves.
- Re-level. Turn the feet in or out on a stationary unit.
- Reload. Reload with the heavier items on the lower shelves only if your own sheet says so; this guide makes no load claim.
How we chose
This is a method guide, not a product list. On 2026-10-21 we opened thirteen pages: seven wire shelving assembly sheets, two Trinity manuals, two Seville Classics sheets, one Rubbermaid closet-system sheet and one ClosetMaid how-to guide. We kept statements that appear in those pages and checked each quoted phrase against the extracted text. Where the pages give different figures, as the ClosetMaid guide does for hanging heights, we show both. The shelf layout table is our own arithmetic, and each assumption is named next to it.
Mistakes to avoid
- Setting the sleeves at different grooves on different posts. The Eagle sheet and the Trinity manual both ask for identical heights.
- Stacking two sleeve pairs on one pole. Trinity says not to place more than one pair on each pole at a time.
- Fitting a sleeve upside down. Trinity says the arrow faces up and the word TOP is right side up.
- Placing the bottom shelf too high. Trinity and Eagle both set a limit near the third notch or groove from the bottom.
- Moving a loaded unit. Seville Classics says not to move the system while loaded.
- Leaving the top shelf too low. The Eagle sheet requires it above the third groove line from the top.
What we could not verify
We did not find a Muscle Rack, Honey-Can-Do or Rubbermaid freestanding wire shelving sheet, so only the Rubbermaid closet-system steps are covered. None of the sheets describes removing a seated shelf or a sleeve, so those steps are our reading. The pages do not state headroom, deck thickness, or the difference between groove number and height above the floor on a given post. They also do not say whether sleeves from one maker fit another maker’s posts. The ClosetMaid guide gives two sets of hanging heights without explanation.
Frequently asked questions
How far apart are the grooves on wire shelving posts?
The Metro sheet puts the grooves at 1 inch intervals, and the Trinity manual describes indentations at 1 inch intervals. The Regency sheet adds that every eighth groove is doubled.
Do I need tools to change the shelf height on a freestanding wire unit?
The sheets describe hand work and a rubber mallet. Trinity says no extra tools are needed to assemble its rack, and Seville Classics suggests lightly tapping shelves into place with a rubber mallet if necessary.
Which way should the sleeves face?
Up. The Trinity manual says the arrow faces up with the word TOP right side up, the Metro sheet puts the beveled end at the top, and the Advance Tabco sheet puts the wider end toward the bottom of the shelf.
How high can the bottom shelf be?
Trinity says the lowest shelf should be lower than the 3rd notch from the bottom, and Eagle says it must be below the third groove line. Metro says to install it as low as possible.
Can I move shelves on a closet wire system?
Yes, on an adjustable one. Rubbermaid says its closet shelves are fully adjustable and that brackets insert into the uprights at the desired locations. ClosetMaid says brackets attach at the desired shelf height.
Bottom line
Plan the grooves on paper, set every sleeve pair at the same groove on all four posts with the arrow up, and keep the end limits in view.
Sources
- https://www.containerstore.com/medialibrary/Assembly/Shelving/33342_IsLit_MetroAssemInstruc.pdf (opened 2026-10-21)
- https://catalog.webstaurantstore.com/documents/pdf/wire_shelving_assembly.pdf (opened 2026-10-21)
- https://pdf.lowes.com/productdocuments/5c15b934-18b8-4c38-b2a8-473cb757c5df/13793143.pdf (opened 2026-10-21)
- https://www.lockers.com/assets/2/6/inst_wireshelving.pdf (opened 2026-10-21)
- https://cdn.restaurantsupply.com/pdf/w/i/r/wireshelving.pdf (opened 2026-10-21)
- https://uline.com/PDF/IH-5674-SPFR.PDF (opened 2026-10-21)
- https://cdn.shopify.com/s/files/1/0611/1533/4810/files/Wire_Shelving_Assembly_Guide_File.pdf (opened 2026-10-21)
- https://images.thdstatic.com/catalog/pdfImages/00/00a23b15-2216-4a03-b5d6-c91eca1de8ad.pdf (opened 2026-10-21)
- https://images.thdstatic.com/catalog/pdfImages/9a/9a8d2f73-dfe8-48f3-ac6e-94ac24568e9c.pdf (opened 2026-10-21)
- https://pdf.lowes.com/productdocuments/1f20c1eb-285c-4c28-9df4-89fdcb1bbd50/69503259.pdf (opened 2026-10-21)
- https://pdf.lowes.com/productdocuments/d767f621-a895-4825-a850-090eaeacd94c/69503256.pdf (opened 2026-10-21)
- https://images.thdstatic.com/catalog/pdfImages/85/85174c90-dc48-4e15-a3dc-bf0849d9eb3e.pdf (opened 2026-10-21)
- https://homedepot.closetmaid.com/en-US/Installation/Pages/how-to-guides.aspx (opened 2026-10-21)
As an Amazon Associate we earn from qualifying purchases.