How to Adjust Metal Shelving
As an Amazon Associate we earn from qualifying purchases.
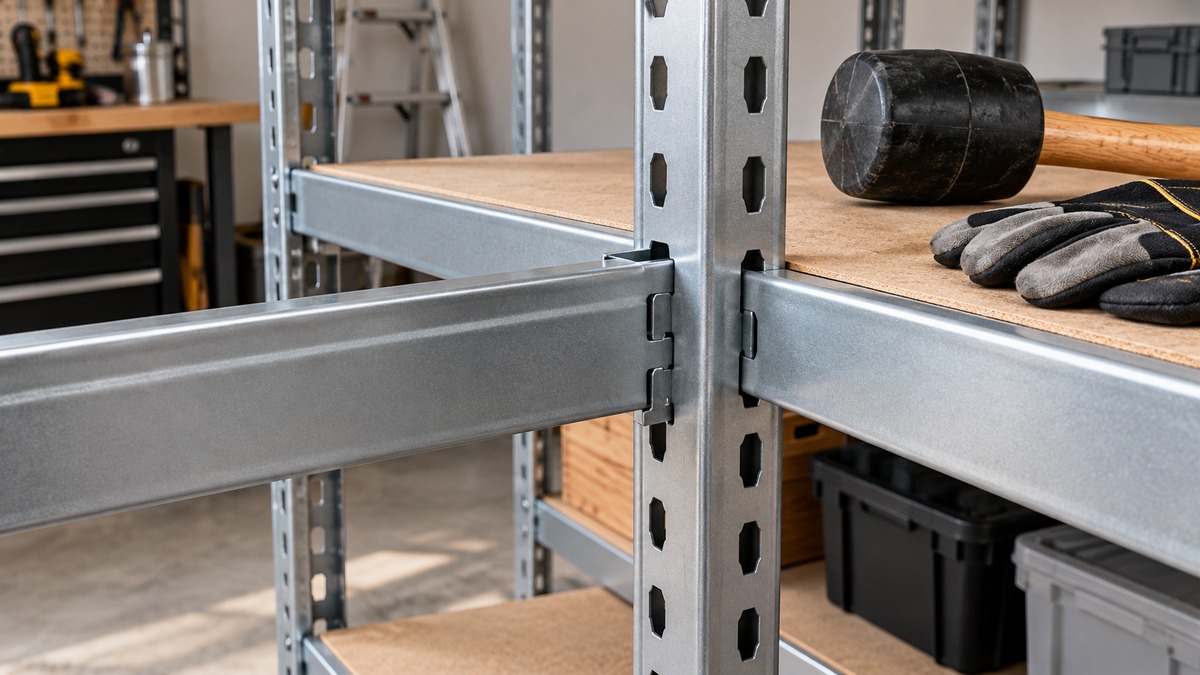
How to adjust metal shelving depends on how your unit holds its shelves. Boltless steel units hang each level on beams and braces whose rivets sit in slots in the posts. Post-and-sleeve units rest each shelf on plastic sleeves that clip into grooves. Either way, you work on an emptied level, move the supports to the same new height on every post, seat them fully, level the unit and check it again. This guide draws on manual pages from Edsal, Muscle Rack and Metro, plus two rivet-shelving suppliers.
Quick answer
- Identify the system first: rivets in keyhole slots (the Edsal and Muscle Rack boltless units) or two-piece sleeves in grooves (the Metro and InterMetro units).
- Seat each rivet all the way down. The Edsal manual asks for gentle taps until the rivets are straight and fully engaged.
- Match the height on all four posts, then recheck the unit for level.
- Secure the unit to a wall. The Edsal manuals say to do so to prevent tipping.
Which kind of metal shelving do you have?
Look at the manual or the label before you change anything, because the two common systems adjust in different ways. In a rivet-and-keyhole unit, each level is a set of beams and braces with rivets at their ends, and the posts carry keyhole slots. In a post-and-sleeve unit, the posts carry grooves, and a pair of plastic sleeves holds each shelf. A bolted angle-iron frame is a third kind. None of the manual pages we opened cover it, so it is outside this guide.
| System | What holds a level | Step between positions | Page that says so |
|---|---|---|---|
| Edsal and Muscle Rack boltless | Beam and brace rivets seated in keyhole slots in the posts | Not stated in the Edsal or Muscle Rack pages. A supplier page says shelves move on 1-1/2 inch centers. | Edsal manuals, Muscle Rack sheet, industrialshelving.com |
| Cisco-Eagle and Hallowell rivet shelving | Beams seated at the bottom of post slots | Not stated | Cisco-Eagle and StoreMoreStore assembly sheets |
| Metro and InterMetro | Two-piece plastic sleeves snapped into post grooves | 1 inch | Container Store sheet 33342 for Metro |
Where a page does not state a step, the table says so. Measure the slot or groove spacing on your own posts before you plan new heights.
Before you move anything
The Edsal manuals open with a safety block that applies to adjusting as much as to building. They say to place the unit on a level surface, never to climb or stand on it, and to use two or more people to assemble and move it. They also say to wear gloves when working with metal parts. The Metro sheet repeats the climbing warning in its own words.
None of the pages we opened describe moving a level while it holds items, and the Edsal sheets show assembly on a bare frame. This guide therefore assumes you empty every level you are changing. Keep a rubber mallet, gloves and a tape measure within reach. The Edsal manual allows a hammer only if you place a cloth or a block of wood between the hammer head and the parts.
Think about the wall before you start. The Edsal manuals say to secure the unit to a wall with suitable fasteners, which are not included. The Metro sheet adds an anti-tip wall bracket for high-traffic areas or earthquake-prone areas. Neither sheet explains how to loosen a wall fastening and refit it, so check how yours is attached before you move the unit. If you are still choosing a unit, our page on Homedant 5-tier metal shelving covers one set of listings.
How to adjust a rivet-and-keyhole (boltless) unit
The Edsal manuals describe assembly, not relocation. The placement rules they give for a new level also govern a beam you move to a new slot. That is our reading of the manuals, not a quoted instruction, so treat the steps below as a method built from the manual rules.
- Empty the level. Take off the items and lift the deck out of the unit.
- Choose the new slot. Count slots from the bottom of each post so that all four posts get the same height. The Edsal 5-shelf manual places each later level in the post slots “of your desired location”.
- Free the beams and braces. A supplier page says shelves can be added or removed with only a hammer or a mallet.
- Set the rivets in the new slots. The Edsal manuals say the narrow end of each keyhole slot must point down and the ledge of each beam and brace must face up.
- Tap the rivets home. Use a rubber mallet on the top edge of the beam or brace. Cisco-Eagle and Hallowell both say the beam must be seated into the bottom of the slots with a rubber mallet.
- Check the engagement. The Edsal manual’s own wording is “Tap gently and be sure the rivets are straight and fully engaged.”
- Measure and reload. Compare the height of the new level on all four posts with a tape, put the deck back, then load the unit.
Where the first level goes and how to space the rest
Two Edsal manuals give a starting point for a five-level unit. The 5-shelf manual builds the first level by skipping one slot from the bottom of the post. The Lowe’s manual for the 48-by-24-by-72-inch unit recommends the second keyhole slot at the bottom of the posts for the bottom shelf, which is the same position. It also says: “The middle shelves should be evenly spaced.” Both manuals build from the bottom up, so the lowest level sets the reference for the others.
The Lowe’s manual offers a second layout. The same parts can be built as two separate 36-inch-high units, one with three shelves and one with two, using all eight post caps and no post connectors. If you move up to taller items, that layout is a different shape of unit, not a new height for the same one.
Units with post joints or splices
The Edsal 5-shelf unit joins its lower and upper posts with post joints. Cisco-Eagle says: “Beams cannot be placed in the level occupied by the splice.” The Hallowell sheet gives the same rule for a splice plate. The Edsal pages we opened do not state that rule, so find where the joint sits on your own posts before you plan a level there.
Linked units that share a post
The Muscle Rack bulk storage rack sheet says units can stand alone or be joined using a common post. It adds: “Individual beams can be adjusted without disturbing the beams in adjoining units.” If you own joined units, you can change one bay without taking down its neighbor. The same sheet says that a hammer should drive the beam-end clip tabs into the end-frame slots, and that bent tabs may need reshaping to their proper form.
How to adjust a post-and-sleeve unit
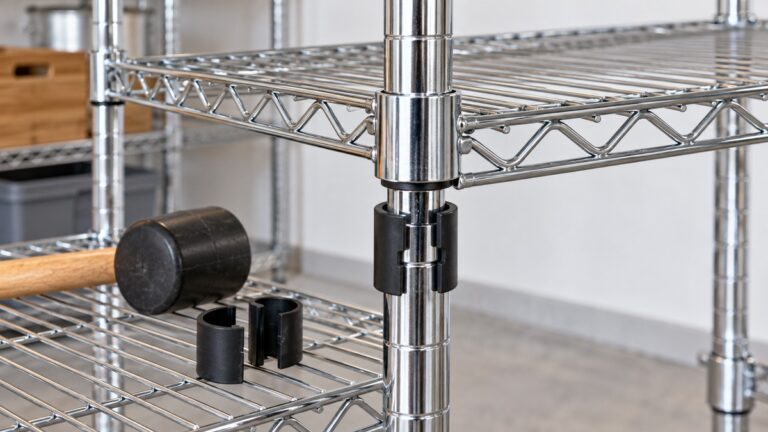
The Metro sheet describes installing shelves on posts that carry grooves at 1 inch intervals. The two-piece plastic sleeves have ridges that fit those grooves. The sheet’s steps are short: choose the height, snap a pair of sleeves onto each post with the beveled end at the top, slide the shelf over the posts until it sits securely over the sleeves, then tap the shelf down in each corner.
The sheet describes a first installation. To relocate a shelf you reverse the sequence on that level and repeat it at the new groove. Lift the shelf off the sleeves, take the sleeves out of the grooves, snap them on at the new groove with the bevel up, and tap the shelf down again. That reversal is our reading of the sheet.
The same sheet sets three rules that matter when you move shelves. Units over 50 inches high must be assembled with at least three shelves, and preferably four or more. The bottom shelf goes as low as possible. The unit must stand on solid, level flooring, and you level it by adjusting the feet. Wire-shelf details such as sleeve orientation are a topic of their own, and this guide keeps to the shared rules.
Pick new heights with simple arithmetic
Choose heights from the items, not from habit. The formula is: spacing needed equals item height, plus headroom, plus deck thickness. Then divide by your step size and round up to a whole number of steps. The pages we opened do not state a deck thickness or a headroom figure, so both are our own assumptions here. Replace them with your measurements.
Assumptions: headroom of 2 inches, deck thickness of 1 inch, and a step of 1-1/2 inches for boltless slots (the supplier’s figure) or 1 inch for Metro grooves (the Metro sheet’s figure).
| Item height (inches) | Spacing needed | At a 1-1/2 inch step | At a 1 inch step |
|---|---|---|---|
| 11 | 11 + 2 + 1 = 14 | 14 ÷ 1.5 = 9.33, so 10 steps = 15.0 inches | 14 ÷ 1 = 14 steps = 14.0 inches |
| 14 | 14 + 2 + 1 = 17 | 17 ÷ 1.5 = 11.33, so 12 steps = 18.0 inches | 17 ÷ 1 = 17 steps = 17.0 inches |
| 17 | 17 + 2 + 1 = 20 | 20 ÷ 1.5 = 13.33, so 14 steps = 21.0 inches | 20 ÷ 1 = 20 steps = 20.0 inches |
The table shows one useful pattern. With a 1-1/2 inch step, each spacing lands 1 inch above the need, because the need does not divide evenly. With a 1 inch step there is no spare room at all.
Now check how many levels a unit gives you. Use a 72-inch-high unit, the height printed in the Edsal manual for its 48-by-18-inch model. Assume 66 inches of usable height between the lowest and highest level, after 6 inches for the base and top margin, which is our own figure. The count of levels equals the usable height divided by the spacing, rounded down, plus one.
| Spacing (inches) | Usable height ÷ spacing | Levels that fit |
|---|---|---|
| 15 | 66 ÷ 15 = 4.4, so 4, plus 1 | 5 |
| 18 | 66 ÷ 18 = 3.67, so 3, plus 1 | 4 |
| 21 | 66 ÷ 21 = 3.14, so 3, plus 1 | 4 |
Moving from 15 to 18 inches of spacing costs one level, and 21 inches gives no further loss. On these assumptions, taller items and five levels together call for a taller unit. For comparison units that list adjustable heights, see adjustable height shelves, or see affordable metal shelves for the home for another set of metal units.
Check the unit after the change
- Look at the rivets. The Edsal manuals ask owners to inspect periodically that brace and beam rivets are seated in the post slots. Do it right after every adjustment.
- Compare the heights. Use a tape on each post. A level that sits at different slots on two posts leaves a shelf that is not flat.
- Level the unit. The Metro sheet levels with adjustable feet on solid flooring. The Edsal manuals ask for a level surface.
- Refit the wall fastening. The manuals’ tipping guidance applies to the adjusted unit as it did to the new one.
- Reload the unit. The pages we opened print load figures for specific models. None are used here, because this guide makes no load claim.
How we chose
This is a method guide, not a product list. We opened seven pages on 2026-10-21: three Edsal and Muscle Rack documents, one Metro assembly sheet, two rivet-shelving assembly sheets from suppliers, and one supplier blog page. We kept only statements that appear in those pages, and every quoted phrase was checked against the extracted text of the page it came from. The tables use our own arithmetic, with each assumption named next to it. Pages that would not open were left out.
Mistakes to avoid
- Leaving a rivet half engaged. The Edsal manual asks for rivets that are straight and fully engaged in the narrow end of the slots.
- Installing a post upside down. The Edsal manual says the posts are directional and the narrow end of the slots must point down.
- Hammering metal on metal. The Edsal manual allows a hammer only with a cloth or a block of wood between hammer and parts.
- Setting a beam at a splice level. Cisco-Eagle and Hallowell both say a beam cannot go where the splice sits.
- Climbing the unit to reach a high level. Edsal and Metro both warn against climbing or standing on the shelving.
- Making a tall unit with too few shelves. The Metro sheet requires at least three shelves on units over 50 inches high.
What we could not verify
The Edsal and Muscle Rack pages we opened describe assembly and do not give relocation steps, so the boltless steps above are built from the assembly rules. None of these pages states a slot spacing in inches for Edsal or Muscle Rack units; the 1-1/2 inch figure comes from a supplier blog. The Muscle Rack page is for a bulk storage rack, not for the boltless units sold with particleboard decks, so it is a close fit rather than an exact one. We found no manual pages for Hyper Tough, Amazon Basics or Gladiator units, so their adjustment methods are not covered. The pages do not state deck thickness, headroom, or how to loosen and refit a wall fastening.
Frequently asked questions
Can I adjust the shelves on a boltless metal shelving unit without taking the whole unit apart?
The Muscle Rack sheet says individual beams can be adjusted without disturbing the beams in adjoining joined units. For a single freestanding unit, the Edsal manuals do not say, so empty and move one level at a time and keep the other levels seated.
Do I need a hammer to adjust metal shelving?
You need a tool to seat the rivets. The Edsal manuals name a rubber mallet first. A hammer is acceptable when a cloth or block of wood protects the parts.
How far apart are the shelf positions?
It depends on the system. The Metro sheet puts its grooves 1 inch apart, and a supplier page says rivet shelves move on 1-1/2 inch centers. The Edsal and Muscle Rack pages we opened do not state a figure.
Which way should the keyhole slots face?
Both Edsal manuals say the narrow end of the slots faces down. The ledge on each beam and brace faces up.
Should the unit be fastened to the wall after I adjust it?
The Edsal manuals say to secure the unit to a wall with suitable fasteners to prevent tipping. Metro recommends an anti-tip wall bracket for high-traffic or earthquake-prone areas.
Bottom line
Empty the level, set the beams or sleeves at the same new height on every post, seat them fully, level the unit and secure it to the wall.
Sources
- https://images.thdstatic.com/catalog/pdfImages/78/78b66fe2-2d37-462c-b8a0-9e99ae1bde19.pdf (opened 2026-10-21)
- https://pdf.lowes.com/productdocuments/f8579311-b081-4eb2-93ec-c482be53b703/43253629.pdf (opened 2026-10-21)
- https://images.homedepot-static.com/catalog/pdfImages/a6/a6852a26-aee1-4791-8b49-f1bd91d28591.pdf (opened 2026-10-21)
- https://www.containerstore.com/medialibrary/Assembly/Shelving/33342_IsLit_MetroAssemInstruc.pdf (opened 2026-10-21)
- https://www.cisco-eagle.com/storage/shelving/Rivet/RivetShelvingAssembly.pdf (opened 2026-10-21)
- https://products.storemorestore.com/hubfs/StoreMoreStore/Shelving-and-Racks/Boltless-Shelving/Assembly-Guide.pdf (opened 2026-10-21)
- https://www.industrialshelving.com/blog/rivet-shelving-resources/ (opened 2026-10-21)
As an Amazon Associate we earn from qualifying purchases.