How to Assemble Wire Shelving
As an Amazon Associate we earn from qualifying purchases.
How to assemble wire shelving follows the same few moves on almost every freestanding unit: fit feet or casters, snap two-piece plastic sleeves onto the posts at the height you want, slide each shelf over the sleeves, seat it with a mallet and level the unit. The order differs by maker, and the sheets we opened disagree on when to fit the feet. This guide compares fourteen assembly sheets, shows where they differ, counts the parts for units of three to five shelves, and covers closet wire shelving that mounts to the wall.
Quick answer
- Work on a flat surface with a second person, and wear gloves. One sheet says to use two people and to wear work gloves.
- Snap the sleeves on first, with the small end or arrow pointing up, at the same height on all four posts.
- Slide each post through a corner collar of the shelf, stand the unit up, and seat the shelf with a mallet, using a towel to protect it.
- Level the unit with the feet, and check that the shelves sit at matching heights on every post.
Check the box before you start
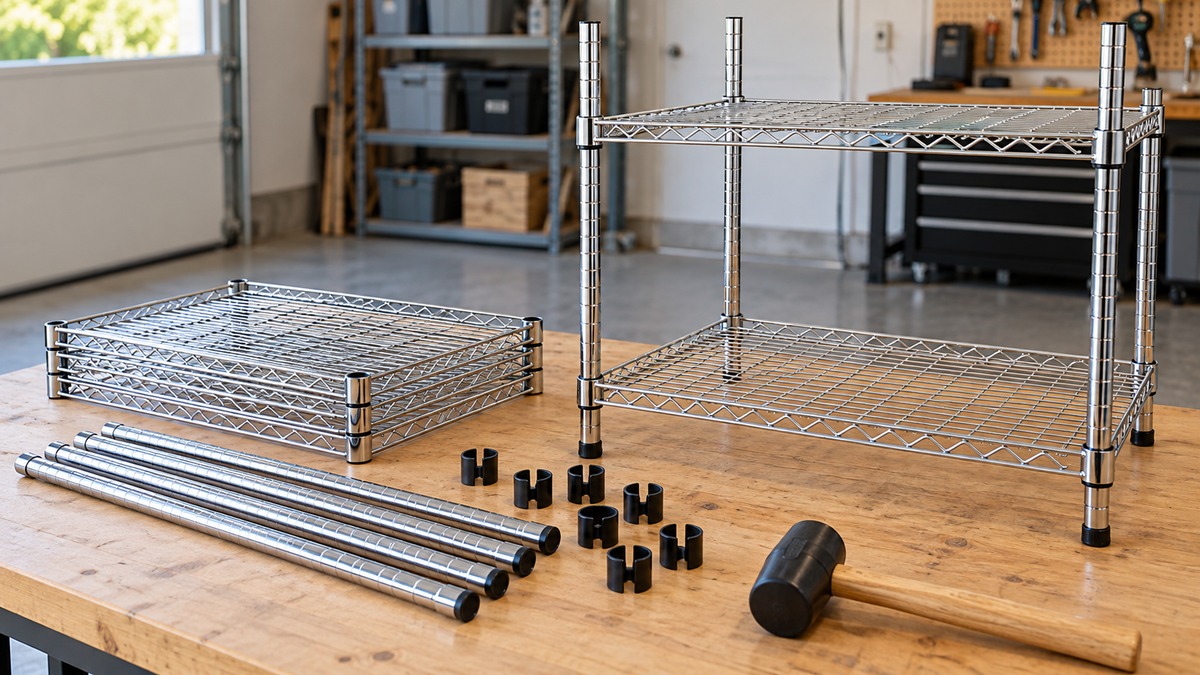
Lay the parts out and count them against the sheet. Shelving Inc says to lay out the parts, take inventory, and assemble on a flat surface. The Eagle Industrial Group sheet gives the same flat-ground advice and says to keep small parts out of the reach of children. Both sheets mention the black plastic discs or rings between the shelves: they are packing material and are to be discarded.
Check how many pieces each post has. Shelving Inc says posts 64 inches and taller come in two pieces, and you screw the top end into the bottom end. The Eagle sheet shows the same split, with four upper posts and four lower posts in its four-shelf kit, and it says to screw the upper post tightly into the lower post.
Take care with edges. The Regency stainless steel sheet warns that stainless edges may be sharp and cause cuts, and says to wear gloves and handle the parts with care. The unbranded stationary-unit sheet from Lowe’s says to use two people when setting up the unit and to wear a pair of work gloves. You will need a rubber mallet. The Regency sheet lists a mallet and cut-resistant gloves as suggested tools, and the WebStaurantStore-hosted sheet lists a mallet and a towel.
Step by step: a freestanding post-and-sleeve unit
- Fit the feet or casters. The Regency sheet says to push casters into the posts, or twist foot levelers in clockwise. Casters can take a little force to seat. If your sheet puts the feet last, skip this step for now (see the table below).
- Snap the sleeves on for the bottom shelf. Each sleeve is two halves. Metro says the posts have grooves at 1 inch intervals and the sleeves have ridges that fit the grooves. Put the beveled end, small end or arrow at the top, as your sheet shows. The Advance Tabco sheet says the wider end of the sleeve faces toward the bottom of the shelf.
- Match the sleeve heights. The Eagle sheet says to make sure the heights are identical for each post. Shelving Inc says to count the notches on each post to make sure the clips are level.
- Slide the posts through the bottom shelf. Hold the shelf on its side and push each post through a corner collar until the sleeves sit firmly inside. The stationary-unit sheet adds that the wire surface is on the top of the shelf, and the Salsbury sheet says the top of the shelf has the large wire grid.
- Stand the unit up and seat the shelf. The Regency sheet says: “Use a mallet and towel to secure the shelf well without damaging it.” The Eagle sheet taps each corner with a rubber mallet, or pushes the shelf firmly into place.
- Add sleeves and shelves above. Snap new sleeves on at the next height and slide the next shelf down over the posts until the sleeves fit firmly. Repeat for each shelf.
- Level the unit. Turn the feet in or out. The Regency sheet says to screw the foot levelers in or out to level the entire unit, and Metro says to level by adjusting the leveling feet on solid flooring.
Where the sheets disagree
The biggest difference is when the feet go on. Several sheets put the feet first, and one puts them last. The table lists the points where the sheets differ. Where a cell says “not stated”, the sheet does not cover that point.
| Sheet | Feet or casters | Sleeve orientation | Seating the shelf | Leveling |
|---|---|---|---|---|
| Metro and InterMetro (Container Store) | Not in the numbered steps | Beveled end at the top | Tap the shelf down in each corner | Adjust the leveling feet |
| Regency stainless steel | Step 2, before the sleeves | Arrow facing up | Mallet and towel | Foot levelers in or out, last step |
| WebStaurantStore-hosted sheet, 8/2024 | Step 2, before the sleeves | Arrow facing up | Mallet and towel | Foot levelers in or out, last step |
| Eagle Industrial Group (Lowe’s) | Step 1, wheels into the lower posts | Arrow pointing up | Rubber mallet on each corner, or push firmly | Not stated |
| Stationary unit (Lowe’s) | Step 1, adjustable feet | Small end pointing up | Press firmly until the cylinders sit over the clips | Not stated |
| Advance Tabco | Posts come with adjustable feet | Wider end toward the bottom of the shelf | Tap lightly with a rubber mallet if needed | Adjust feet, final step |
| Salsbury | Last, with the unit on its side | Clip marked UP, alignment marks | Not stated | Not stated |
| Shelving Inc | Step 1, feet into the bottom of each post | Not stated | Flip upright and tap the corners | Not stated |
The sheets agree on one point under the different wording: the small end of the sleeve, the beveled end and the arrow all point up. The Advance Tabco instruction, with the wider end toward the bottom of the shelf, describes the same placement from the other side. If your sheet shows an arrow or a marking, follow the sheet.
Know which end of the post is up
Some posts have a top and a bottom. The Salsbury sheet says the top end has the first groove about 1/2 inch from the end, and the bottom end has the first groove about 2-1/2 inches from the end. It says all four posts must face the same way when you fit the clips for the bottom shelf. The Regency sheet notes that every eighth groove is doubled and the posts are notched in 1 inch increments, which gives you a visual landmark when you count notches.
The Advance Tabco sheet says the posts are numbered for convenience in leveling the shelf, and the Metro sheet notes whether wires run front to back or side to side. The Metro Commercial wires run front to back, and the InterMetro wires run side to side. If your shelf is square, Shelving Inc says the wires must run in the same direction for assembly.
Count the parts
The sheets let you work out how many sleeves a unit needs. The Advance Tabco sheet lists four plastic tapered split sleeves per shelf. The stationary-unit sheet lists 16 shelf clips for four shelves, which is four per shelf, and describes each as a two-piece clip. The Eagle sheet lists 32 clip sleeve pieces for four shelves, which matches four two-piece sleeves per shelf if each piece is one half. That match is our reading of the parts table. The Trinity manuals list slip sleeves by the piece and tell you to place one pair per pole for each shelf: 48 for the six-shelf rack and 40 plus 2 extra for the five-shelf rack. That is 8 pieces, or 4 pairs, per shelf. Seville Classics counts both ways: its four-shelf sheet lists 34 slip sleeves, which reads as 32 pieces plus 2 spares, and its five-shelf sheet lists 20, which reads as 20 pairs. A count on a parts list can mean pieces or pairs, so read the sheet for your unit.
The formula is: sleeve pairs equal 4 times the number of shelves, and halves equal 2 times the pairs. The table applies it to three, four and five shelves, and adds the post pieces for units that use two-piece posts.
| Shelves | Sleeve pairs (4 per shelf) | Sleeve halves (2 per pair) | Post pieces, standard posts | Post pieces, 64 inch and taller |
|---|---|---|---|---|
| 3 | 3 × 4 = 12 | 12 × 2 = 24 | 4 | 4 × 2 = 8 |
| 4 | 4 × 4 = 16 | 16 × 2 = 32 | 4 | 4 × 2 = 8 |
| 5 | 5 × 4 = 20 | 20 × 2 = 40 | 4 | 4 × 2 = 8 |
The sheets do not say what ships with a given kit, so count your own box against your own sheet. The Salsbury sheet also lists 16 shelf clips for four shelves, so the same pattern shows up there.
Tall units and shelf positions
Metro gives two rules that matter when you plan a tall unit. Units over 50 inches high must be assembled with at least three shelves, and preferably four or more. The bottom shelf goes as low as possible. The Eagle sheet gives a placement note for stability: the bottom shelf must sit below the third groove line from the bottom of the pole, and the top shelf above the third groove line from the top. The Eagle note adds a limit on the top shelf, which must not sit lower than that third groove line.
Metro also warns against climbing or standing on the shelving, and recommends an anti-tip wall bracket in high-traffic or earthquake-prone areas. Moving shelves after assembly is a separate task. For a unit that comes with clothes-hanging hardware, see wire closet shelving with a clothes rod, and for a whole-closet approach, see closet organizer ideas for wire shelving.
Casters, add-on units and quick-adjust shelves
Three variations show up in the sheets. For a mobile unit, Advance Tabco says to slip rubber wheel bumpers over the bottom of each post and push the swivel stem casters in. The Salsbury sheet adds a retainer step: turn the silver nut on top of the caster once clockwise, place the caster in the post, then turn the caster retainer clockwise until the rubber expands to hold it in place. The WebStaurantStore-hosted sheet says casters should be in the locked position when you are not moving the unit.
For add-on units, Advance Tabco says to assemble the add-on with only two posts. It then supplies two S-hooks per shelf. You place the hooks over the shelf edge of the freestanding unit and lower the adjoining shelf edge of the add-on onto them.
The Uline Quick Adjust sheet shows a different shelf style. It snaps standard shelf supports around the post at the groove, wide end down, and slides the post through the underside of a standard shelf. Quick adjust shelves use shelf clips and lock clips instead, and the sheet says that to remove a clip you push up on the lock clip. The sheet also says to align the posts so the notches sit at a 45 degree angle to the shelf, then gently tap the shelf down.
If you mean closet wire shelving that mounts to the wall
Closet wire shelving is a different system. The shelves hang from track or clips on the wall rather than standing on posts, so a post-and-sleeve sheet does not apply. The ClosetMaid how-to guide lists hardware by wall type: for drywall, drill 1/2 inch holes and use toggle bolts; for studs, use #12 by 2 inch pan head screws at the stud locations; for concrete, drill 1/4 inch holes and use #12 wall anchors with screws.
The same guide says hang track can go at any height, though flush to the ceiling gives the most adjustability. It says standards should be no more than 24 inches apart and no more than 4 inches from the end of the shelf, and each standard takes one screw at the hole closest to the center. Brackets attach at the shelf height you want, and the bracket size matches the shelving depth. Wire shelving can be cut with a bolt cutter or hacksaw, and shelf caps go on the cut ends. For the sleeves-and-posts style, the rest of this guide applies.
How we chose
This is a method guide, not a product list. We opened fourteen assembly sheets and manuals and one wall-mounted installation guide on 2026-10-21, from Metro, Regency, Eagle Industrial Group, Advance Tabco, Salsbury, Uline, Shelving Inc, Trinity, Seville Classics, two unbranded sheets hosted by retailers, and ClosetMaid. We kept only the statements that the sheets make, and we checked each quoted phrase against the text of its page. We left out load figures. The part-count table is our arithmetic from the sheets’ parts lists, and the sheets do not state that formula themselves.
Mistakes to avoid
- Mixing up the sleeve ends. Every sheet that shows an orientation puts the small end, bevel or arrow at the top.
- Setting the clips at different heights. The Eagle sheet asks for identical heights on each post, and Shelving Inc says to count notches.
- Hitting the shelf directly. The Regency and WebStaurantStore-hosted sheets say to use a mallet and a towel.
- Skipping the leveling step. Both the Metro sheet and the Regency sheet include leveling with the feet.
- Building a tall unit with too few shelves. Metro requires at least three shelves on units over 50 inches high.
- Mixing post ends. The Salsbury sheet says all four posts must face the same way.
What we could not verify
We did not find a Muscle Rack, Honey-Can-Do or Rubbermaid freestanding wire shelving sheet, so those makers’ steps are not covered. Two of the sheets, the WebStaurantStore-hosted one and the stationary-unit one from Lowe’s, do not name a brand in the text, so we describe them by where they are hosted. The sheets do not state a time to assemble, a torque for the post joint, or the quantity of sleeves in your box. The ClosetMaid guide covers the wall-mounted system only. None of these pages says whether sleeves from one maker fit another maker’s posts.
Frequently asked questions
Which way do the plastic sleeves face on wire shelving?
Every orientation note we found puts the small or beveled end up. The Regency and Eagle sheets say the arrow faces up, and the Metro sheet says the beveled end is at the top.
Do I need a rubber mallet to put wire shelving together?
Most sheets use one. The Regency sheet suggests a rubber mallet, and Advance Tabco says to tap lightly with a rubber mallet if necessary. The Regency sheet pairs the mallet with a towel so the shelf is not damaged.
Should the feet go on first or last?
It depends on the sheet. Regency, Eagle, Shelving Inc and the stationary-unit sheet fit the feet or wheels first, while the Salsbury sheet installs them last with the unit on its side. Follow the order in your own box.
How many sleeves does a four-shelf unit need?
The Advance Tabco sheet lists four per shelf, which comes to 16 sleeve pairs for four shelves. The Eagle sheet lists 32 clip sleeve pieces for four shelves, which fits the same rule if each piece is a half.
Can two wire shelving units be joined together?
Advance Tabco describes an add-on unit built with two posts and joined with S-hooks, two per shelf. Other sheets we opened do not describe joining units.
Bottom line
Snap the sleeves on level and arrow up, slide each shelf over them, seat it with a mallet and towel, and finish by leveling the feet.
Sources
- https://www.containerstore.com/medialibrary/Assembly/Shelving/33342_IsLit_MetroAssemInstruc.pdf (opened 2026-10-21)
- https://www.containerstore.com/pdf/assembly/metro_assembly.pdf (opened 2026-10-21)
- https://catalog.webstaurantstore.com/documents/pdf/wire_shelving_assembly.pdf (opened 2026-10-21)
- https://argo.webstaurantstore.com/documents/pdf/wire_shelving_installation_guide.pdf (opened 2026-10-21)
- https://pdf.lowes.com/productdocuments/5c15b934-18b8-4c38-b2a8-473cb757c5df/13793143.pdf (opened 2026-10-21)
- https://pdf.lowes.com/productdocuments/3b905711-ff74-4e06-8afb-9eaf6626bd2e/41416018.pdf (opened 2026-10-21)
- https://cdn.restaurantsupply.com/pdf/w/i/r/wireshelving.pdf (opened 2026-10-21)
- https://www.lockers.com/assets/2/6/inst_wireshelving.pdf (opened 2026-10-21)
- https://uline.com/PDF/IH-5674-SPFR.PDF (opened 2026-10-21)
- https://images.thdstatic.com/catalog/pdfImages/00/00a23b15-2216-4a03-b5d6-c91eca1de8ad.pdf (opened 2026-10-21)
- https://images.thdstatic.com/catalog/pdfImages/9a/9a8d2f73-dfe8-48f3-ac6e-94ac24568e9c.pdf (opened 2026-10-21)
- https://pdf.lowes.com/productdocuments/d767f621-a895-4825-a850-090eaeacd94c/69503256.pdf (opened 2026-10-21)
- https://pdf.lowes.com/productdocuments/1f20c1eb-285c-4c28-9df4-89fdcb1bbd50/69503259.pdf (opened 2026-10-21)
- https://cdn.shopify.com/s/files/1/0611/1533/4810/files/Wire_Shelving_Assembly_Guide_File.pdf (opened 2026-10-21)
- https://homedepot.closetmaid.com/en-US/Installation/Pages/how-to-guides.aspx (opened 2026-10-21)
As an Amazon Associate we earn from qualifying purchases.